Grab My Blinkie

Favorite Scrap Stores


Thursday, September 13, 2012
New Cluster Frames & Snags
I have some new cluster frames and snags for you today using a beautiful PTU kit from Jackie's Jewels called "Tea Party Dream". You can find the download link below the previews:


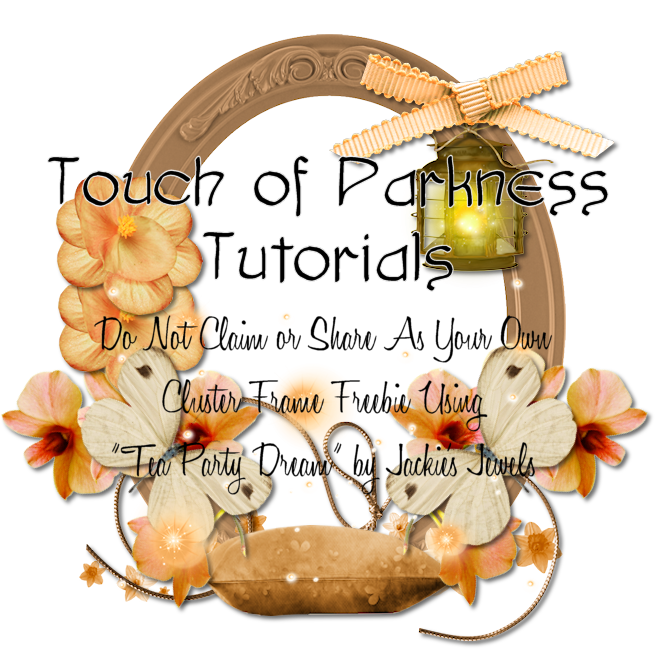

And here are your snags:


Wednesday, September 12, 2012
Witchy Flight
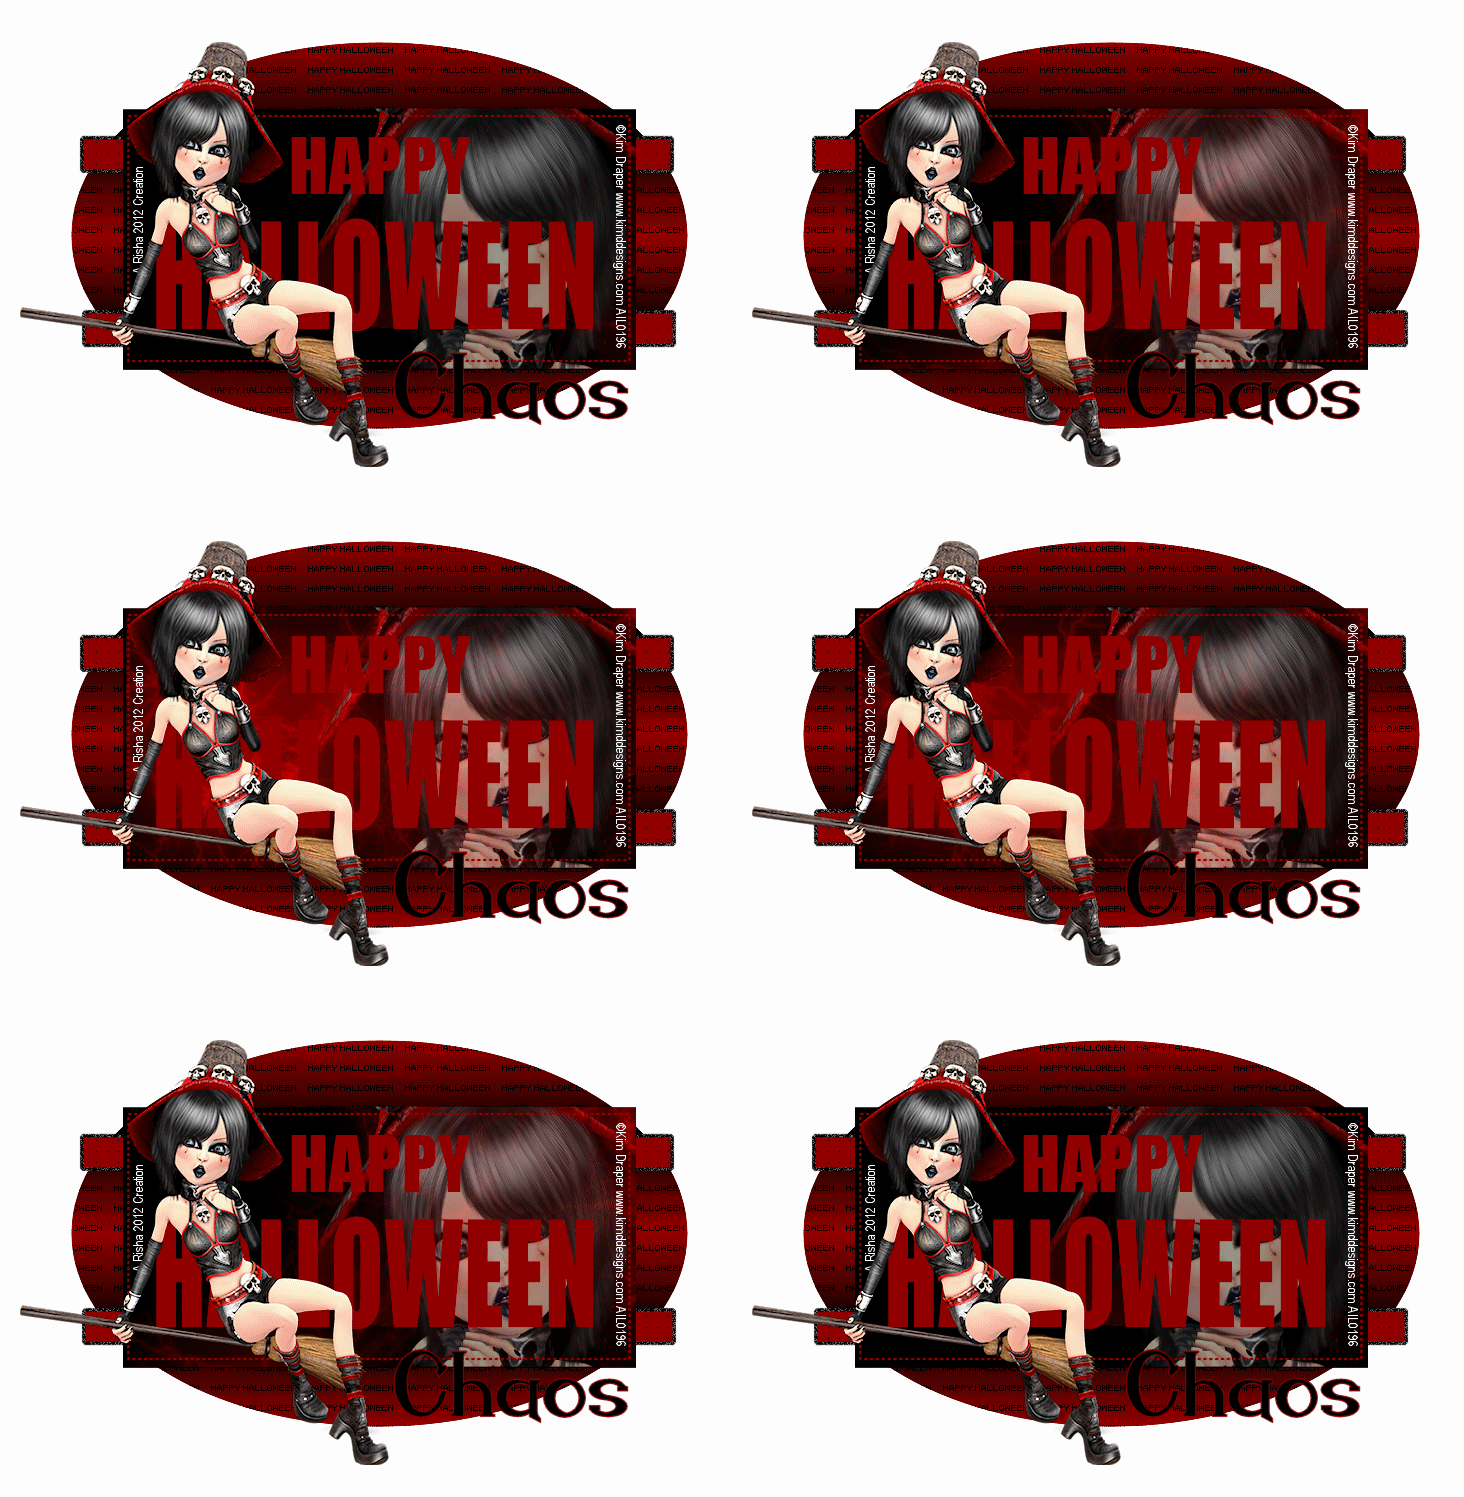
Witchy Flight
This tutorial was written by me on September 12 using PSP X4. All my tutorials assume you have some working knowledge of PSP and/or Animation Shop.
Supplies:
Tube of Choice - I'm using the art of Kim Draper. You need a license to use her art which you can
purchase a license and tubes at AIL.
Template - I'm using Tracy's Halloween Template 10. You can download this template HERE.
Animation - I'm using animation 12 from Chaos. Visit her blog HERE to download.
Animation Shop
Font - I'm using Endora
To begin open your template in PSP - shift-D to duplicate and close original - open tube and minimize
This is a very long tutorial with a lot of steps and we are going to start by getting our animation ready first
ANIMATION PREP STEPS:
1. Open up Animation Shop and open your animation
2. Click on Frame 51 - hold down shift key and click on Frame 100 - this will select all the frames 51-100 - go to edit and hit delete
3. Click on Frames 1 - 4 and delete those
4. Choose a color from your tube (not black) - go to edit - select all - animation - replace color - click all frames - old color blue - new color the one from your tube - click ok
5. Edit - selections - select all - copy and paste as NEW animation - edit - select all - edit - copy - on original animation - click on last frame - edit - paste - after current frame ( you should have 100 frames) - play your animation to make sure that it doesn't skip
BACK TO PSP
1. Delete copyright layer - click on your oval layer on template - layers - new raster layer - move to bottom - image - canvas size - 800 x 600 - flood fill white
2. Back on your template - choose 2 colors from your tube and create a gradient with the following setting : linear, angle 0 , repeats 3
3. Beginning on your oval layer - selections - select all - float - defloat - new raster layer - flood fill with gradient - repeat for your other layers leaving the rectangle layer black
4. On rectangle layer - selections - select all - float - defloat - copy/paste your tube close up as a new layer - selections - invert - delete - copy/paste your full tube as a new layer and position on tag - resize if needed
5. Crop your tag and resize - add copyright and license info ( will we add name later) - close out your copyright/license layers, top 2 text layers ( Happy Halloween), tube layers and rectangle layer - merge visible - close out your merged layer leaving rectangle layer closed - open the other layers and merge those visible - you should now have 3 layers: 2 merged layers and your rectangle layer
6. On your bottom merged layer (white background, oval, small text and strips) - edit - copy
BACK TO ANIMATION SHOP
1. Edit - paste as new animation - duplicate until you have 100 frames ( yep, that many) - minimize for now
2. Back in PSP - on rectangle layer - edit - copy - BACK in animation shop - edit - paste - as new animation - duplicate this layer until you have 100 frames
3. Maximize your animation - edit - select all - edit - copy - BACK on rectangle - edit - select all - edit - paste into current frame - play your animation - if happy we are now ready to crop - edit - selections - select all - click on your crop button ( it looks the same as the one in PSP) - options - surround opaque - click ok
4. Edit - selections - select all - copy - back on your merged layer animation - edit - select all - edit - paste into current frame - position your rectangle and release mouse - play animation again
BACK TO PSP
1. Click on your other merged layer - edit - copy and go back to animation shop
ANIMATION SHOP
1. Edit - paste as new animation - edit - click on propagate paste - edit - copy - click on your tag making sure all layers are selected - paste into current frame - position and release mouse - play your animation once again - if you are happy save ( I always save my blank animated tags so I can add names to them later)
BACK TO PSP ( promise this is the last time!)
Add your name using your text and convert to raster and copy your name layer - back to animation shop one more time
ANIMATION SHOP
1. Paste your name as new animation - copy - on your tag making sure propagate paste is still selected - paste into current selection - position and release mouse - save as .gif
That's it!! I know it's a lot of steps, but would love to see what you create!!
Tuesday, September 11, 2012
Into The Darkness
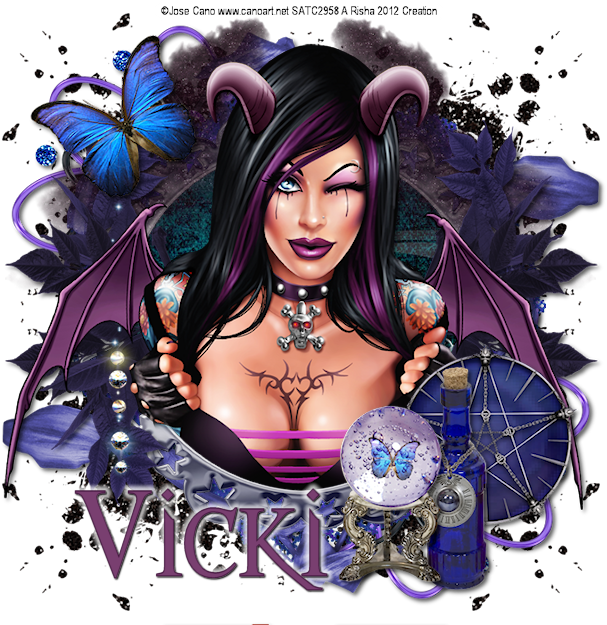
Into The Darkness
This tutorial was written by me on September 11 using PSP X4. All my tutorials assume you have some working knowledge of PSP and/or Animation Shop.
Supplies:
Tube of choice - I'm using the art of Jose Cano. You must have a license to use his art and you can purchase tubes/license at SATC.
Scrap Kit - I'm using a great kit by Gemini Creationz called "Darkness Falls". You can purchase this kit at SATC.
Font - I'm using Morpheus
To begin open your tube in PSP and minimize - Open a new 700 x 700 image white background
1. Copy/paste e31 as a new layer - center in canvas - resize by 110% - copy/paste e38 as new layer - move down and to the right just a bit - duplicate - move this layer up and to the left just a bit - they will overlap in the center just a bit - drop shadow your leaf layers only
2. Copy/paste e16 as new layer - resize 110% - center in canvas and adjust - you want the mesh frame and leaf layers to peek out around the frame - click inside frame with magic wand - copy/paste paper of choice as new layer - selections - invert - delete - leave selected and move paper layer below frame
3. Copy/paste e1 as new layer - position over paper layer - duplicate - move this layer up just a bit - hit delete on both layers - copy/paste your tube as a new layer - resize - using eraser tool remove parts of tube you don't want showing - selections - select none - on your paper layer use your pick tool and stretch the paper to fit inside frame better - drop shadow frame and tube layers
4. Click on frame layer - copy/paste e26 as new layer - position on top of frame - duplicate - image - mirror - copy/paste e20 as new layer - using pick tool rotate to the right just a bit - position on frame - duplicate - image flip - merge down - duplicate - image - mirror - merge down - drop shadow this layer
5. Copy/paste e11 as new layer - position on left side of frame - drop shadow - copy/paste e14 as new layer - resize and rotate - position on top left of frame
6. Click on tube layer - copy/paste any other elements of choice as new layers positioning on your tag - drop shadow each layer
7. Back on white background - copy/paste e32 as new layer - position towards the top left of tag - duplicate - image - mirror - merge down - duplicate - image - flip - merge down - duplicate again - image - free rotate 90 - merge down
8. Copy/paste e46 as new layer - position towards the top left of tag - duplicate - image - mirror then flip - drop shadow
9. Close out white background - crop/resize tag - add copyright/license info and name - save as .png
That's it!! Thank you for trying my tutorial!!
Monday, September 10, 2012
Hope

Hope
This tutorial was written by me using PSP X4. All my tutorials assume you have some working knowledge of PSP and/or Animation Shop.
Supplies:
Tube of choice - I'm using Zindy Nielsen's 2009 BCA Awareness image called "Pink Hope". You need a license to use this image and you can purchase tubes/license at her shop HERE.
Scrap Kit - I'm using Lexi Creations BCA Awareness PTU kit called "Hope Whispers". Visit her blog HERE to find out where you can purchase this great kit.
Mask - I'm using WSL mask84 which you can download HERE.
Font - I'm using Chalet Comprime - Milan Seventy
To begin open your tube and mask in PSP and minimize - Open a new 700 x 700 image white background
1. Copy/paste Frame 1 as a new layer - resize- move to the upper left - duplicate - move this layer down and to the right letting them overlap just a bit - click inside first frame with magic wand - copy/paste paper of choice as new layer - selections - invert - delete - repeat for other frame - drop shadow both frame layers
2. Copy/paste your tube as a new layer - resize - position on the bottom frame - using eraser tool remove parts of tube you don't want showing - drop shadow tube layer
3. Copy/paste Ribbon 2 as new layer - resize and arrange along bottom of tag - drop shadow
4. Copy/paste Charm 1 as new layer - resize - position on tag - copy/paste Awareness ribbon as new layer - resize and position on tag - drop shadow both layers
5. Copy/paste Kitty as new layer - resize and position on bottom right of tag - drop shadow - copy/paste sparkle as new layer - resize and position
6. Click on white background - copy/paste Satin Flower of choice as new layer - resize and position towards the top right of tag - duplicate - resize again and position - merge down - duplicate - image flip then mirror - drop shadow both layers
7. Close out white background - crop/resize tag - add copyright/license info and name - save as .png
That's it! Thank you for trying my tutorial!!
Dark Wonderland
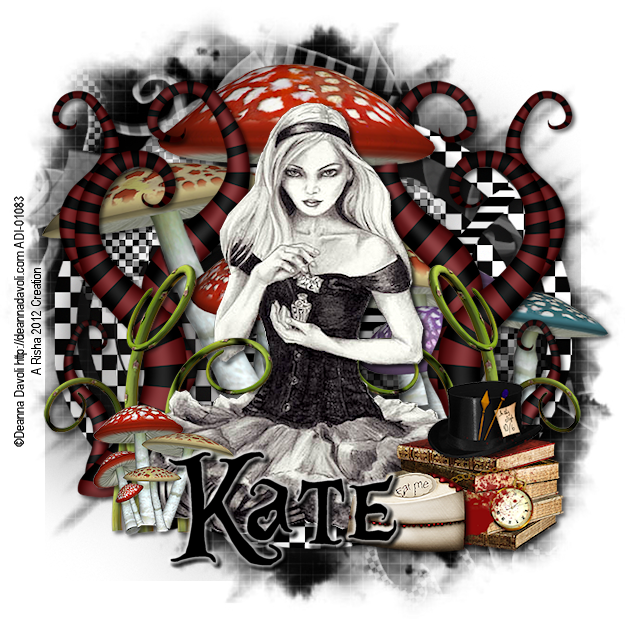
Dark Wonderland
This tutorial was written by me on September 10 using PSP X4. All my tutorials assume you have some working knowledge of PSP and/or Animation Shop.
Supplies:
Tube(s) of choice - I'm using a great image from Deanna Davoli. You must have a license to use her art and you can purchase tubes/license at Artistic Dreams Imaging.
Scrap Kit - I'm using a wonderfully wicked kit from Irish Bitch Designs. Visit her blog HERE to find out where to purchase this great kit.
Mask - I'm using WSL Mask 302 from Weescotslass Creations. You can download this mask HERE.
Eye Candy 5 Impact Gradient Glow
Font - Alice In Wonderland
To begin open your tube and mask in PSP - minimize - Open a new 700 x 700 image white background
1. Copy/paste Vortex as new layer - center in canvas - copy/paste Mushroom 2 as new layer - resize by 85% - move up just a bit towards the top of vortex - drop shadow heavy: I went with 4,4,85,6 black
2. Copy/paste Swirl as new layer - position on the left side of Vortex - duplicate - image - mirror - using your eraser tool erase parts of the Swirl to make it appear that they twine through the mushrooms - drop shadow
3. Copy/paste your tube as a new layer - resize if needed - position on tag and duplicate
4. Click on original tube layer - copy/paste Vines as new layer - resize 50% - position on left side of tag - duplicate - image - mirror - using eraser tool - on your top tube layer erase the elbow on the left side of tube - drop shadow bottom tube layer and vine layers
5. Copy/paste Mushroom as new layer - resize 50% twice - position on left side of tag - drop shadow
6. Copy/paste Books and Cake as new layer - resize and position on bottom right of tag - drop shadow both layers
7. On white background - selections - select all - copy/paste paper of choice INTO selection - selections - select none - layers - new mask layer - from image - apply mask, delete original layer - merge group
8. Close out white background - crop/resize tag, add copyright/license info and name - save as .png
That's it!! Thank your for trying my tutorial!!
Sunday, September 9, 2012
Kiss Me Softly
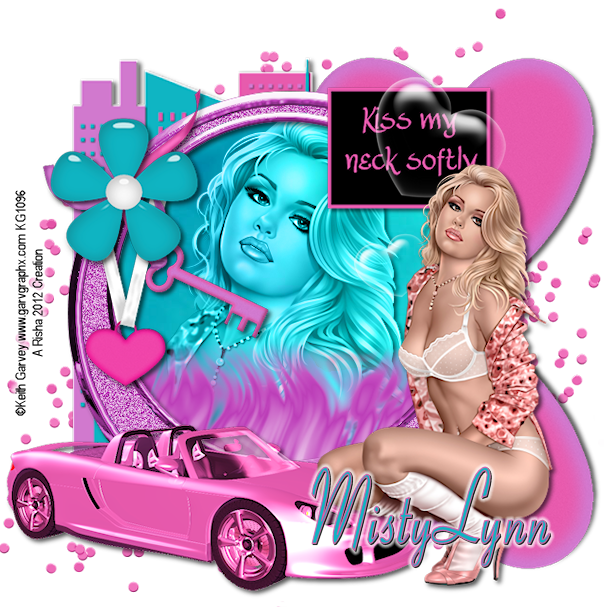
Kiss Me Softly
This tutorial was written by me on September 9 using PSP X4. All my tutorials assume you have some working knowledge of PSP and/or Animation Shop.
Supplies:
Tube(s) of choice - I'm using the art of Keith Garvey. You must have a license to use his art which you can purchase at his store HERE.
Scrap Kit - I'm using a great PTU kit from MistyLynn's Creations called "Seduction". Visit her blog HERE to find out where you can purchase this great kit.
Font - I'm using Aspire
To begin open up your tube in PSP and minimize - new 700 x 700 image white background - This is an easy, breezy tut so let's get started:
1. Copy/paste skyline as new layer - resize - position on tag - center in canvas - add drop shadow
2. Copy/paste frame 01 as new layer - center in canvas - click inside with magic wand - selections - modify - expand by 8 - copy/paste paper of choice as new layer - selections - invert - delete - copy/paste tube as new layer - position in frame resizing if needed - delete - add drop shadow and change properties to Luminance(L) - copy/paste fire of choice as new layer - position resizing if needed - hit delete again - drop shadow fire - selections - select none - drop shadow frame layer
3. Copy/paste the following elements as new layer resizing as needed : bubbles, flower of choice, heart ribbon of choice, key, sports car, and word art - arrange on your tag how you want - drop shadow each layer
4. Click on cityscape - copy/paste lock as new layer - resize and position towards the top left of cityscape - duplicate - image - flip - drop shadow both layers
5. On white background - copy/paste sparkle of choice as new layer - position on tag - duplicate - image - mirror - position
6. Close out white background - crop/resize tag and add copyright/license info and name - save as .png
That's it!! Thank you for trying my tutorial!!
Bada Bing
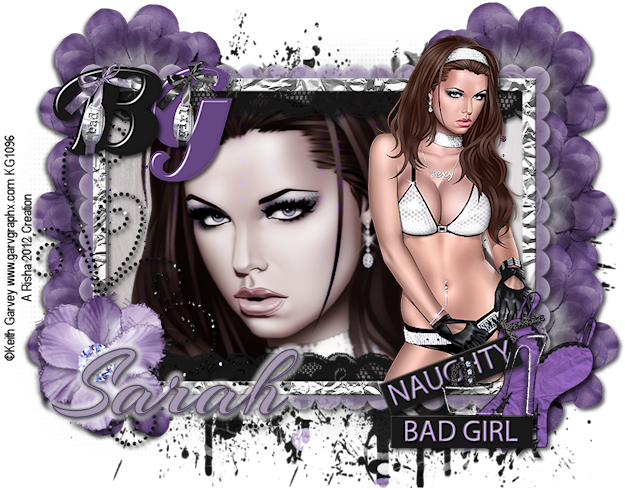
Bada Bing
This tutorial was written by me on September 9 using PSP X4. All my tutorials assume you have some working knowledge of PSP and/or Animation Shop.
Supplies:
Tube(s) - I'm using the art of Keith Garvey. You need a license to use his art which you can get at his store HERE.
Scrap Kit - I'm using a great PTU kit from Designs by Sarah called "Bada Bing". You can purchase this kit at PMTw/S.
Mask
Font - I'm using Arizonia
Filters - Xero Porcelain
To begin open tube(s) and mask in PSP - minimize for now
1. Open Frame 3 in PSP - shift+D to duplicate - close out original - canvas size 900 x 700 - new raster layer - flood fill white - move below frame
2. Click inside frame with magic wand - selections - modify - expand by 8 - copy/paste paper of choice as new layer - selections - invert - delete - copy/paste your tube as a new layer - position - delete - selections - select none
3. Duplicate your tube layer - on bottom layer change properties to Luminance (L) - on top layer - xero - porcelain - drop shadow your bottom tube layer and your frame layer
4. Copy/paste your tube again as new layer - position on tag - resize if necessary and drop shadow
5. Copy/paste any elements of your choice as new layers - resizing and positioning around your tag - I used bad word art, girl word art, naughty label, bad girl label, corset, and shoe - drop shadow each layer
6. Click on white background - copy/paste a flower of choice as new layer - resize and position behind your frame - duplicate 2 times and arrange (see my tag) - merge these layers together - duplicate - image - mirror - drop shadow both layers
7. Close out white background - crop/resize tag - add copyright/license info and name - save as .png
That's it! Thank you for trying my tutorial!!
Subscribe to:
Posts (Atom)
About Me

- Risha
- Vernon, Florida, United States
- Hello! I'm a SAHM of 2 beautiful children Wyatt & Caitlyn and have been married to my wonderful husband Everett for 9 years. I live in a small town in NW Florida and am owned by several miniature dachshunds. I've been PSPing for 7 years now and just now decided to put my tags into tutorial form. When I'm not busy taking care of my various animals which not only is dachshunds, but includes various types of fowl and poultry I am playing with my kids or at my computer.
Licensing


