Grab My Blinkie

Favorite Scrap Stores


Showing posts with label Designs by Sarah. Show all posts
Showing posts with label Designs by Sarah. Show all posts
Tuesday, September 18, 2012
Enchanted
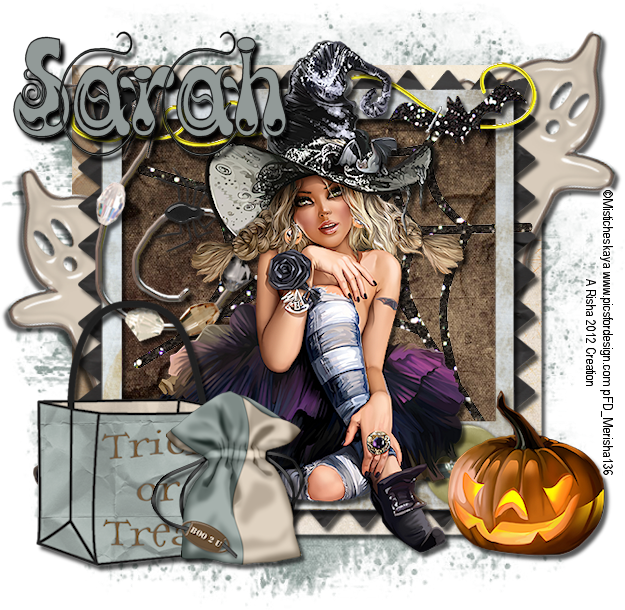
Enchanted
This tutorial was written by me on September 18 using PSP X4. All my tutorials assume you have some working knowledge of PSP and/or Animation Shop.
Supplies:
Tube - I'm using a beautiful tube from Misticheskaya. You need a license to use her art and you can purchase tubes/license at PFD.
Scrap Kit - I'm using a great PTU kit from Designs by Sarah called " Boo 2 U". You can purchase this kit at PMTw/S.
Mask of choice
Font - I'm using Kingthings Slippery Lip
To begin open your tube and mask in PSP - minimize for now - new 700 x 700 image white background
1. Copy/paste grunged frame as a new layer - center in canvas - copy/paste folded frame as a new layer - center in canvas - copy/paste dirty button frame as a new layer - center in canvas - click inside this frame with magic wand - selections - modify - expand by 6 - copy/paste paper of choice as a new layer - selections - invert - delete - move paper below button frame only - leave selected and copy/paste a web of choice as a new layer - position and hit delete - select none - drop shadow each frame layer and web
2. Click on grunged frame and copy/paste a ghost of choice as a new layer - resize and position so he is peeking out from behind frame - duplicate - image - mirror and position other ghost - drop shadow both layers
3. Click on top layer - copy/paste boo string as a new layer - resize and position on top of frame - drop shadow
4. Copy/paste hanger as a new layer - position on top left corner of frame - drop shadow - copy/paste spider of choice as a new layer - position on top left corner -drop shadow
5. Copy/paste your tube as a new layer - resize and position on tag - drop shadow
6. Copy/paste any other elements you choose, resizing if needed and position around your tag - drop shadow each layer
7. On white background - copy/paste paper of choice as a new layer - layers - new mask layer - from image- apply mask and delete original - merge group
8. Close out white background - crop/resize tag - add copyright/license info and name - save as .png
That's it! Thank you for trying my tutorial!!
Sunday, September 9, 2012
Bada Bing
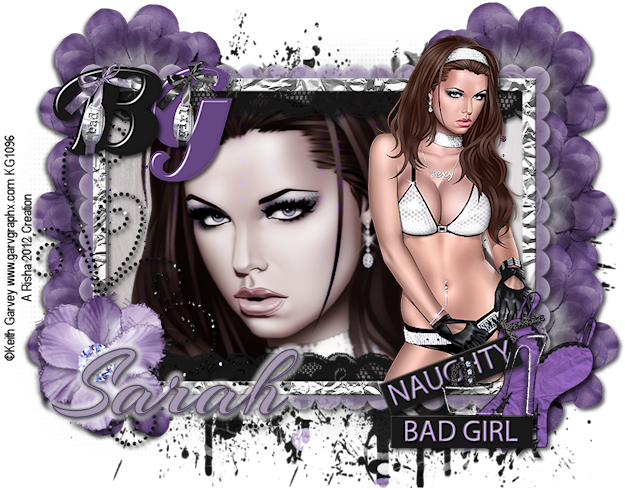
Bada Bing
This tutorial was written by me on September 9 using PSP X4. All my tutorials assume you have some working knowledge of PSP and/or Animation Shop.
Supplies:
Tube(s) - I'm using the art of Keith Garvey. You need a license to use his art which you can get at his store HERE.
Scrap Kit - I'm using a great PTU kit from Designs by Sarah called "Bada Bing". You can purchase this kit at PMTw/S.
Mask
Font - I'm using Arizonia
Filters - Xero Porcelain
To begin open tube(s) and mask in PSP - minimize for now
1. Open Frame 3 in PSP - shift+D to duplicate - close out original - canvas size 900 x 700 - new raster layer - flood fill white - move below frame
2. Click inside frame with magic wand - selections - modify - expand by 8 - copy/paste paper of choice as new layer - selections - invert - delete - copy/paste your tube as a new layer - position - delete - selections - select none
3. Duplicate your tube layer - on bottom layer change properties to Luminance (L) - on top layer - xero - porcelain - drop shadow your bottom tube layer and your frame layer
4. Copy/paste your tube again as new layer - position on tag - resize if necessary and drop shadow
5. Copy/paste any elements of your choice as new layers - resizing and positioning around your tag - I used bad word art, girl word art, naughty label, bad girl label, corset, and shoe - drop shadow each layer
6. Click on white background - copy/paste a flower of choice as new layer - resize and position behind your frame - duplicate 2 times and arrange (see my tag) - merge these layers together - duplicate - image - mirror - drop shadow both layers
7. Close out white background - crop/resize tag - add copyright/license info and name - save as .png
That's it! Thank you for trying my tutorial!!
Friday, September 7, 2012
Luna Witch
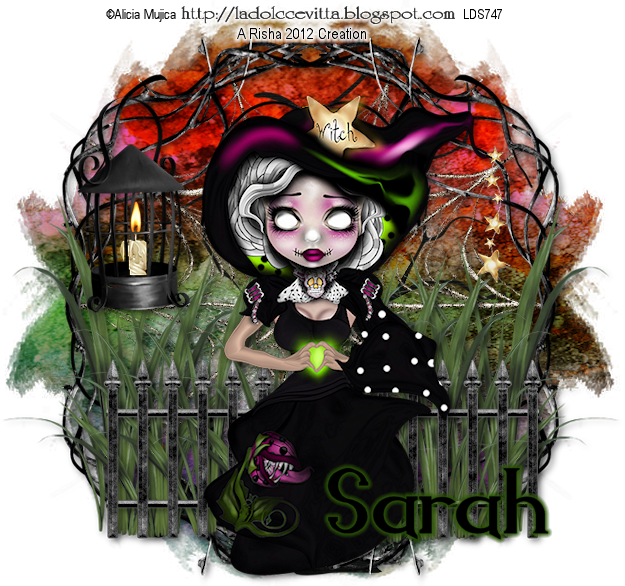
Luna Witch
This tutorial was written by me on September 7 using PSP X4. All my tutorials assume you have some working knowledge of PSP and/or Animation Shop.
Supplies:
Tube of choice - I'm using a fantastic new image from Alicia Mujica. You need a license to use her art and you can purchase tubes/license at her blog HERE.
Scrap Kit - I'm using an adorable kit from Designs by Sarah. You can purchase this kit at PMTw/S.
Texture - I'm using a texture from kuschelirmel-stock. You can download this texture HERE.
Mask - I'm using grunge mask 4 from Tonya. You can download this mask HERE.
Font - I'm using Endora
Eye Candy 5000 gradient glow - dsb flux bright noise
To begin open tube, mask, and texture in PSP - minimize for now - open a new 700 x 700 image white background
1. We are going to make the frame so copy/paste branch as new layer - position on left side of tag - duplicate - image - mirror - merge down - duplicate this layer - image - flip - merge down
2. Create a gradient using 2 colors from your tube - linear, angle 0, repeats 3 - add a new raster layer - floodfill with your gradient - layers - new mask layer - from image - apply your mask - delete original layer - merge group - new raster layer - selections - select all - copy/paste your texture into selection - deselect - apply your mask again - change properties on texture layer to overlay
3. Copy/paste tree as new layer - resize - position on tag - c/p spiderweb as new layer - dsb flux bright noise settings your choice - drop shadow web and frame layers - use eraser tool to remove parts of web showing outside of frame
4. Copy/paste grass as new layer - position - duplicate - image - mirror - duplicate again - image - resize 85% - position - duplicate this layer as many times as you want arranging along the bottom of frame - merge your grass layers together - drop shadow
5. Copy/paste fence as new layer - resize - position along bottom of frame - drop shadow
6. Copy/paste cage as new layer - resize - position on top left of frame - copy/paste candle as new layer - resize pretty small cause we are going to make it appear it is in the cage - when you are happy with the size of candle position it over the cage how you want it to appear - using your selection tool - freehand - trace around the parts of the candle you don't want showing - hit delete on keyboard - if you mess up just hit undo - once you are happy drop shadow candle and cage
7. Close out white background - crop/resize tag to your preference - add copyright/license info and name - save as .png
That's it!! Hope you enjoy my tutorial!!
Monday, September 3, 2012
PTU Tut: Wicked Babe
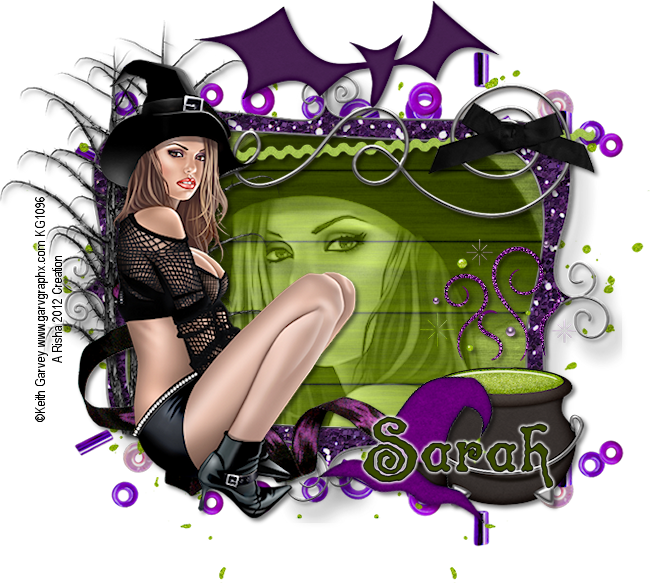
Wicked Babe
This tutorial was written by me on September 3 using PSP X4. All my tutorials assume you have some working knowledge of PSP and/or Animation Shop.
Supplies:
Tube of choice - I'm using the art of Keith Garvey. You must have a license to use his art which you can purchase at his store HERE.
Scrap Kit - I'm using Designs by Sarah's portion of the "Wicked Way" store collab from PMTw/S. You can purchase this great collab HERE.
Font - I'm using Spinstee
To begin open a new 700 x 700 image white background - open tube in PSP and minimize for now
1. Copy/paste frame 1 as new layer - resize - click inside with magic wand - selections - modify - expand by 6 - copy/paste paper of choice - selections - invert - delete - copy/paste tube - position and resize - delete - change properties to Luminance (L) and opacity to your choice - drop shadow tube and frame layers
2. Copy/paste tree as new layer - resize - position on left side of frame - drop shadow - c/p ribbon 2 as new layer - image - mirror - resize - position on left side of frame - drop shadow - copy/paste your tube as new layer - resize - position over ribbon - drop shadow
3. Copy/paste ribbon 1 as new layer - resize - iamge - mirror - position along top of frame - drop shadow
4. Copy/paste bat, cauldron, and witch's hat as new layers - resize and position on tag- drop shadow each layer
5. Click on white background - copy/paste beads as new layer - resize - position towards top of tag - duplicate - image - flip - drop shadow both layers
6. Copy/paste splatter of choice as new layer - resize - position on tag - duplicate - image - flip
7. Close out white background - crop/resize tag - add copyright/license info and name - save as .png
That's it!! Thank you for trying my tutorial!!
Monday, August 27, 2012
PTU Tut: Autumn's Splendor

Autumn's Splendor
This tutorial was written by me on August 27 using PSP X4. All my tutorials assume you have some working knowledge of PSP and/or Animation Shop.
Supplies:
Tube of choice - I'm using the beautiful art of Jasmine Becket-Griffith. You need a license to her art and you can purchase tubes/license at CDO.
Scrap Kit of choice - I'm using an amazing kit from Designs by Sarah called " Fierce Fall ". You can purchase this great kit at Pimp My Tags w/Scraps.
Font - I'm using Jellika BeesAntique Handwriting
Filters - Eye Candy 4000 gradient glow
To begin open your tube(s) in PSP - minimize - new image - 700 x 700 white background
1. Copy/paste Frame 2 as new layer - resize if desired - position in center of canvas - with selection tool - free hand - trace around your first frame opening - selections - invert - copy/paste paper of choice - delete - copy/paste tube as new layer - position in frame - delete - selections - select none - repeat for other frame opening - drop shadow tube and frame layers
2. Copy/paste Flower 1 as new layer - resize - position behind your paper layers (see my tag) - duplicate - image - flip - position - drop shadow both layers
3. Copy/paste leaf pile as new layer - resize - position on right bottom of first frame opening - duplicate - image - mirror - position - merge down - drop shadow
4. Copy/paste indian corn as new layer - resize - rotate to left - position over leaf pile - duplicate - image - mirror - position - merge down - drop shadow - repeat for flower 2
5. Copy/paste leaves and rope as new layer - resize - position - drop shadow
6. Close out white background - merge visible - duplicate - on original layer - adjust - blur - gaussian blur 15 - effects - texture - blinds 17, 100 color - one from tag - adjust - add/remove noise - uniform - monochrome - 57
7. Crop/resize tag - add copyright/license info and name - save as .png
That's it! Thank you for trying my tutorial!!
Friday, August 17, 2012
PTU TUT: Fairy Tale

Fairy Tale
This tutorial was written by me on August 17 using PSP X4. All my tutorials assume you have some working knowledge of PSP and/or Animation Shop.
Supplies:
Tube of choice - I'm using the beautiful art of Elias Chatzoudis. You need a license to use this image. You can purchase his tubes and a license at his store HERE.
Scrap Kit of choice - I'm using an amazing kit from Designs by Sarah called " A Sorta Fairytale". You can purchase this great kit at Pimp My Tags w/Scraps.
Mask - I am using zuzzana mask 60 which you can get HERE . It is the 9th mask listed.
Font of choice - I'm using akaFrivolity
To begin open mask and tube in PSP - minimize for now
1. Open a new 700 x 550 image white - c/p a paper of choice as a new layer - layers - new mask layer - from image - invert mask data checked - apply zuzzana's mask - delete original mask layer - merge group - this is going to be our frame
2. Copy/paste lights as new layer - resize if wanted - position - copy/paste bricks as new layer - position - drop shadow
3. Copy/paste branch 2 as new layer - resize and rotate 90 left - position on left side of tag - duplicate - image - mirror - drop shadow both layers - copy/paste moon as new layer - image - mirror - position on right side of tag and move below the branch layers
4. Copy/paste clouds as new layer - position towards top of tag
5. Copy/paste flowers 1 as new layer - resize if needed - position on bottom of tag - duplicate - image - mirror - drop shadow both layers
6. Copy/paste quill and ink as new layer - resize - position on left of tag - drop shadow - c/p ribbon charm as new layer - position towards top of tag - drop shadow
7. Copy/paste your tube as new layer - resize if desired - position and drop shadow
8. Close out white background - crop/resize tag and add copyright/license info and name - save as .png
That's it! Hope you enjoyed my tutorial and would love to see your results!
Subscribe to:
Posts (Atom)
About Me

- Risha
- Vernon, Florida, United States
- Hello! I'm a SAHM of 2 beautiful children Wyatt & Caitlyn and have been married to my wonderful husband Everett for 9 years. I live in a small town in NW Florida and am owned by several miniature dachshunds. I've been PSPing for 7 years now and just now decided to put my tags into tutorial form. When I'm not busy taking care of my various animals which not only is dachshunds, but includes various types of fowl and poultry I am playing with my kids or at my computer.
Licensing


