Grab My Blinkie

Favorite Scrap Stores


Showing posts with label FTU Tuts. Show all posts
Showing posts with label FTU Tuts. Show all posts
Monday, September 17, 2012
Gothie's Party

Gothie's Party
This tutorial was written by me on September 17 using PSP X4. All my tutorials assume you have some working knowledge of PSP and/or Animation.
Supplies:
Tube - I'm using the newest cutie from SkyScraps. You need a license to use her art and you can purchase tubes/license at SATC.
Scrap Kit - I'm using a FTU kit from Sassy Deb's Scraps. You can download this kit at Artistic Dreams Imaging. Click on freebies after registering.
Mask - I'm using Grunge Mask1 from Tonya. You can get this mask HERE.
Font - I'm using Casper
To begin open your tube and mask in PSP - minimize for now - new 700 x 700 image white background
1. Copy/paste Frame 5 as a new layer - resize - center in canvas - using free hand tool set on freehand, trace around the outer ring of frame - selections - invert - copy/paste paper of choice as a new layer - hit delete on keyboard - move paper layer below frame - select none
2. Click on Frame layer - copy/paste Branch 2 as a new layer - resize and rotate 75 left - position on frame - duplicate - image mirror - position - drop shadow both layers
3. Copy/paste Balloon 1 and Balloon 2 as new layers - resize on smaller than the other and position on left side of frame - drop shadow both layers
4. Copy/paste Flower of choice as a new layer - resize and position on the bottom left of frame - duplicate - image mirror - drop shadow both layers - copy/paste another flower as a new layer - resize and position in the center of the other 2 flowers and move below those layers - drop shadow
5. Copy/paste any other elements you would like and position around your tag - resize if needed and drop shadow each layer
6. Copy/paste your tube as a new layer and position on tag - drop shadow
7. Click on white background - copy/paste Doodle of choice as a new layer - position on the top right of canvas - duplicate - image mirror then flip - drop shadow both layers
8. Copy/paste fan of choice as a new layer - position on tag - duplicate - image mirror then flip - drop shadow
9. On white background - copy/paste a paper of choice as a new layer - layers - new mask layer - from image - apply mask and delete original mask layer - merge group
10. Close out white background - crop/resize tag - add copyright/license info and name - save as .png
That's it!! Thank you for trying my tutorial!!
Saturday, September 15, 2012
Pink FairyTale
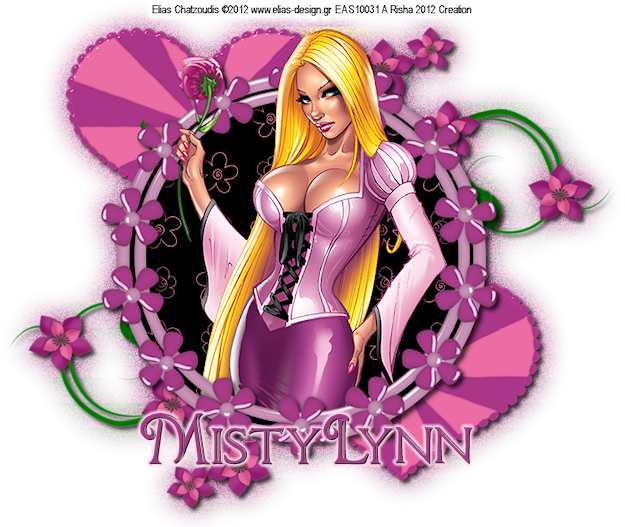
Pink FairyTale
This tutorial was written by me on September 15 using PSP X4. All my tutorials assume you have some working knowledge of PSP and/or Animation Shop.
Supplies:
Tube of choice - I'm using the art of Elias Chatzoudis. You need a license to use his art. You can purchase tubes and license at his store HERE.
Scrap Kit - I'm using a great FTU kit from MistyLynn's Creations called "Palomamania". You get download this kit at her blog HERE.
Font - I'm using ChocolateBox Decorative
To begin open your tube in PSP and minimize for now - New 800 x 700 image white background
1. Copy/paste FlowerFrame 2 as a new layer - resize if desired - center in canvas - with freehand tool set to point to point - trace along the outer ring of frame - copy/paste a paper of choice as a new layer - selections - invert - delete - move below frame layer - selections - select none
2. On frame layer - copy/paste tube as new layer - resize - position - duplicate - move below frame layer, but above paper layer - on top tube layer - erase the parts of tube you don't want showing - repeat for bottom tube - drop shadow bottom tube and frame layers
3. On white background - copy/paste heart of choice - move to the top left of tag - duplicate - move to the bottom right of tag - drop shadow both layers
4. Copy/paste doodle flower of choice - position on right side of tag - duplicate - image mirror and flip - position - drop shadow both layers
6. Close out white background - merge your tag visible and duplicate - on bottom merged layer - adjust - blur -gaussian blur 15 - effects - texture - blinds settings your choice changing color to one from tag - effects - texture - weave - setting your choice changing colors to another from tag - adjust - add/remove noise - settings your choice
7. Leave white background closed - crop/resize tag to your preference - add copyright/license and name - save as .png
That's it! Thank you for trying my tutorial!!
Wednesday, September 12, 2012
Witchy Flight
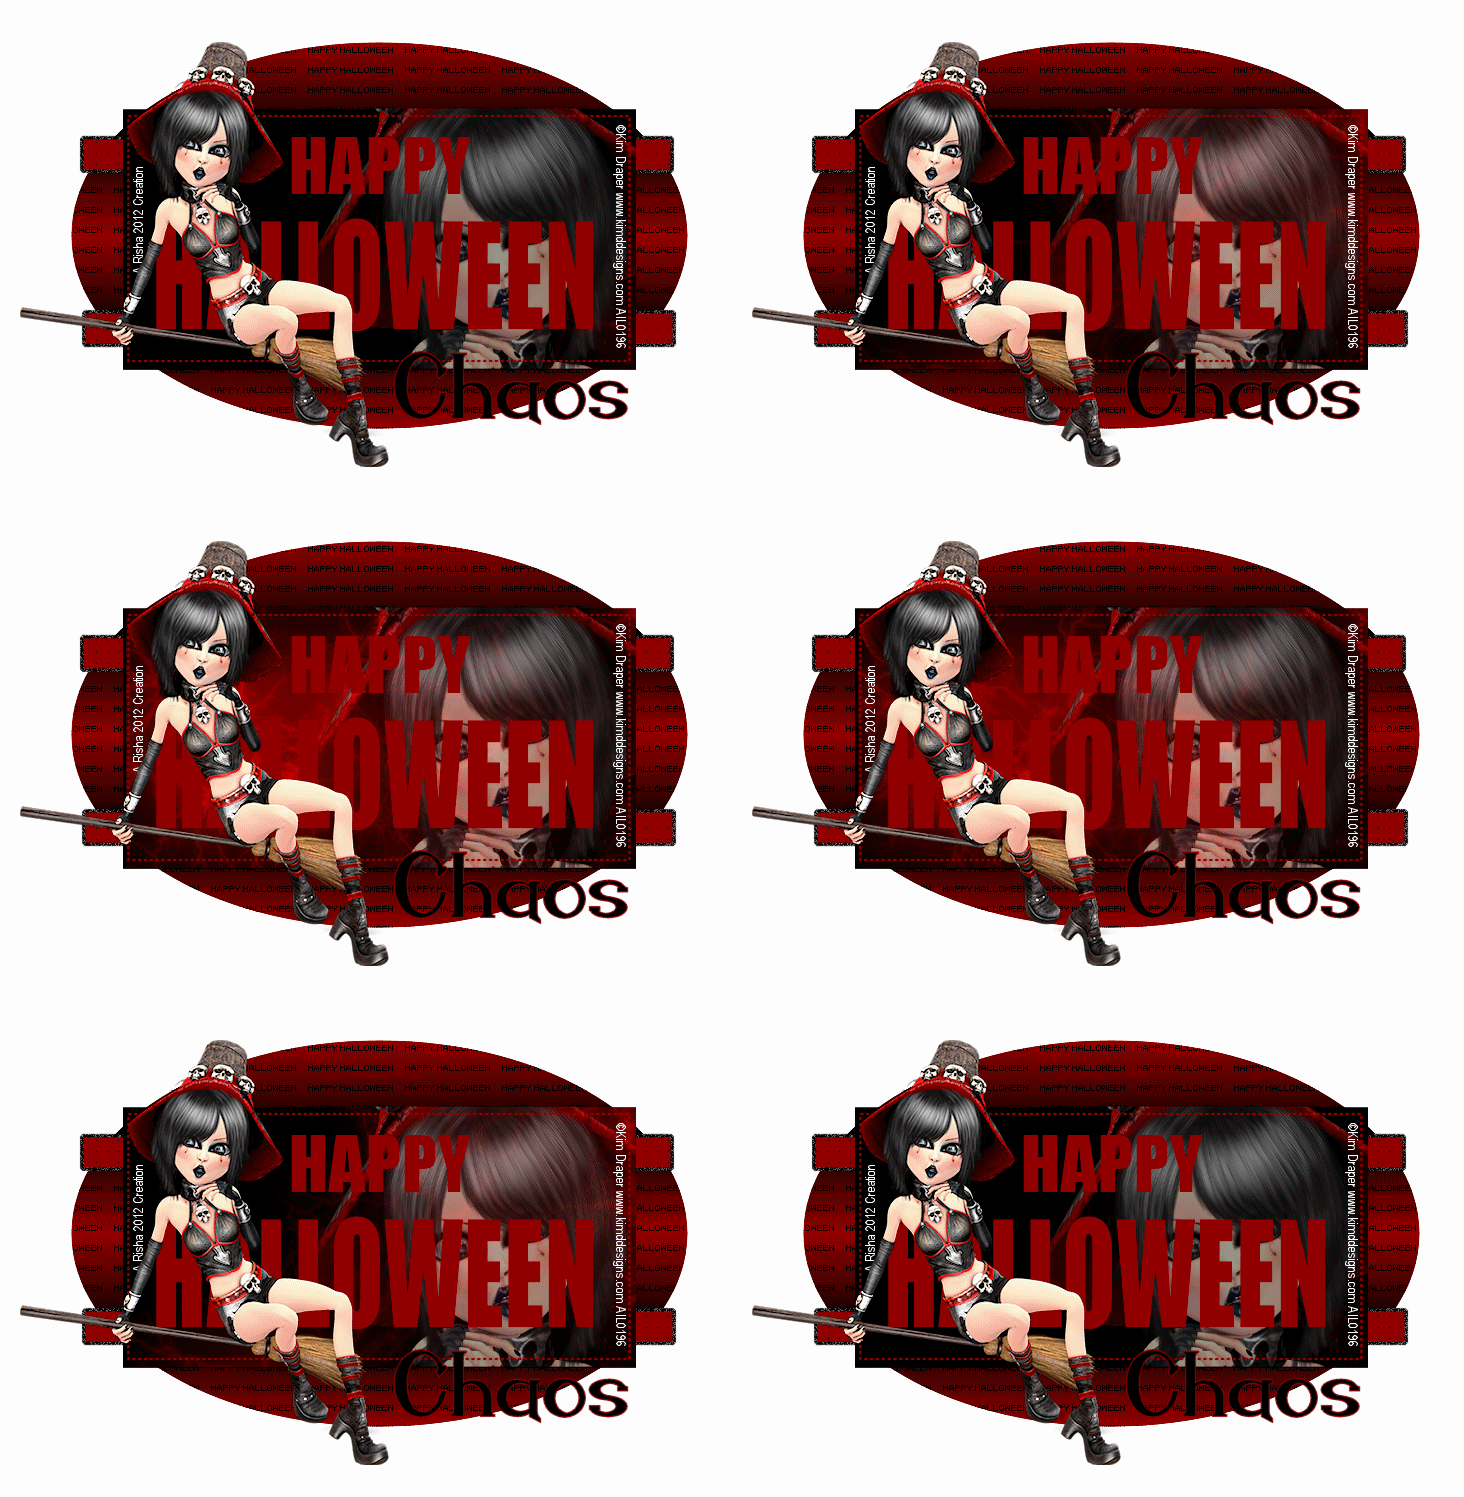
Witchy Flight
This tutorial was written by me on September 12 using PSP X4. All my tutorials assume you have some working knowledge of PSP and/or Animation Shop.
Supplies:
Tube of Choice - I'm using the art of Kim Draper. You need a license to use her art which you can
purchase a license and tubes at AIL.
Template - I'm using Tracy's Halloween Template 10. You can download this template HERE.
Animation - I'm using animation 12 from Chaos. Visit her blog HERE to download.
Animation Shop
Font - I'm using Endora
To begin open your template in PSP - shift-D to duplicate and close original - open tube and minimize
This is a very long tutorial with a lot of steps and we are going to start by getting our animation ready first
ANIMATION PREP STEPS:
1. Open up Animation Shop and open your animation
2. Click on Frame 51 - hold down shift key and click on Frame 100 - this will select all the frames 51-100 - go to edit and hit delete
3. Click on Frames 1 - 4 and delete those
4. Choose a color from your tube (not black) - go to edit - select all - animation - replace color - click all frames - old color blue - new color the one from your tube - click ok
5. Edit - selections - select all - copy and paste as NEW animation - edit - select all - edit - copy - on original animation - click on last frame - edit - paste - after current frame ( you should have 100 frames) - play your animation to make sure that it doesn't skip
BACK TO PSP
1. Delete copyright layer - click on your oval layer on template - layers - new raster layer - move to bottom - image - canvas size - 800 x 600 - flood fill white
2. Back on your template - choose 2 colors from your tube and create a gradient with the following setting : linear, angle 0 , repeats 3
3. Beginning on your oval layer - selections - select all - float - defloat - new raster layer - flood fill with gradient - repeat for your other layers leaving the rectangle layer black
4. On rectangle layer - selections - select all - float - defloat - copy/paste your tube close up as a new layer - selections - invert - delete - copy/paste your full tube as a new layer and position on tag - resize if needed
5. Crop your tag and resize - add copyright and license info ( will we add name later) - close out your copyright/license layers, top 2 text layers ( Happy Halloween), tube layers and rectangle layer - merge visible - close out your merged layer leaving rectangle layer closed - open the other layers and merge those visible - you should now have 3 layers: 2 merged layers and your rectangle layer
6. On your bottom merged layer (white background, oval, small text and strips) - edit - copy
BACK TO ANIMATION SHOP
1. Edit - paste as new animation - duplicate until you have 100 frames ( yep, that many) - minimize for now
2. Back in PSP - on rectangle layer - edit - copy - BACK in animation shop - edit - paste - as new animation - duplicate this layer until you have 100 frames
3. Maximize your animation - edit - select all - edit - copy - BACK on rectangle - edit - select all - edit - paste into current frame - play your animation - if happy we are now ready to crop - edit - selections - select all - click on your crop button ( it looks the same as the one in PSP) - options - surround opaque - click ok
4. Edit - selections - select all - copy - back on your merged layer animation - edit - select all - edit - paste into current frame - position your rectangle and release mouse - play animation again
BACK TO PSP
1. Click on your other merged layer - edit - copy and go back to animation shop
ANIMATION SHOP
1. Edit - paste as new animation - edit - click on propagate paste - edit - copy - click on your tag making sure all layers are selected - paste into current frame - position and release mouse - play your animation once again - if you are happy save ( I always save my blank animated tags so I can add names to them later)
BACK TO PSP ( promise this is the last time!)
Add your name using your text and convert to raster and copy your name layer - back to animation shop one more time
ANIMATION SHOP
1. Paste your name as new animation - copy - on your tag making sure propagate paste is still selected - paste into current selection - position and release mouse - save as .gif
That's it!! I know it's a lot of steps, but would love to see what you create!!
Monday, August 20, 2012
FTU TUT - Halloween Cutie

Supplies:
Tube of Choice - I'm using an adorable tube from Moshilove. You must have a license to use this image and you can purchase tubes/license at Artistically Inclined Licensing.
Scrap Kit - I'm using a FTU kit from Kittz Kreationz. You can download this kit HERE.
Mask of choice - I'm using WSL Mask 81. You can download this mask HERE.
Font - I'm using Reklame Script Regular
To begin open your tube and mask in PSP - minimize for now
1. Open a new 700 x 700 image white background - with your preset shape tool - ellipse - oval width 12 drag out your frame - convert to raster - with magic wand click on black color on frame - copy/paste paper of choice Into selection - selections - select none
2. Click inside frame with magic wand - selections - modify - expand by 4 - copy/paste another paper as new layer - selections - invert delete - select none - click inside frame once more - copy/paste tube as new layer - resize - with eraser remove parts of tube you don't want showing - selections - select none - drop shadow frame and tube
3. Click on paper layer - copy/paste Haunted House as new layer - resize - position in frame - with eraser remove parts sticking outside of frame - drop shadow
4. Click on frame layer - copy/paste flower vine - resize - position on top of frame - drop shadow - copy/paste sign post - resize - position on right side of frame - drop shadow - copy/paste witch hat as new layer - resize - rotate - position on top of sign post - drop shadow
5. Copy/paste ghost as new layer - resize - position on tag - drop shadow - c/p Halloween tag as new layer - resize - rotate and position on top left of tag - drop shadow
6. Copy/paste the following elements, resizing and rotating as needed : witches broom, spooky spells, witches cauldron - position along bottom of tag - drop shadow each layer
7. Close out white background - crop/resize tag - add copyright/license info and name - save as .png
That's it!! Thank you for trying my tutorial!!
Friday, August 10, 2012
FTU TUT - Seduction

Seduction
This tutorial was written by me on August 10 using PSP X4. All my tutorials assume you have some working knowledge of PSP and/or Animation Shop.
Supplies:
Tube of choice - I'm using the art of Arthur Crowe. You must have a license to use his art. You can purchase tubes/license here.
Scrap Kit of Choice - I'm using an awesome FTU kit from Lexi Creationz. Visit her blog here to download and check out her other great kits!
Mask of choice - I'm using WSL_mask79 from WeeScotLass. You can get this mask and her other great creations here.
Font of Choice - I'm using Dirty & Classic
This is an easy-peazy tut and I want you to have fun with it. Open your tube and mask in PSP - minimize
1. Open a 700 x 700 white image - c/p cityscape as new layer - resize if needed - drop shadow
2. C/P your tube as new layer - position - drop shadow
3. Click on cityscape - c/p disco ball as new layer - resize if needed - position behind your tube up towards the top of tag - dropshadow
4. C/P sparkles as new layer - position - c/p pearly string as new layer - resize - position - drop shadow
5. C/P chrome heart 1 as new layer - resize - position - drop shadow
6. C/P ribbon 2 as new layer - rotate 90 - resize - position along bottom of cityscape - drop shadow - click on tube layer - c/p word art as new layer - resize - position over tube to hide the bottom ( I don't like seeing cutoff) - drop shadow
7. On white background layer - copy paper of choice as new layer - layers - new mask layer - from image - apply mask - delete mask layer - merge group - adjust - add/remove noise - setting to your preference - c/p wire1 as new layer - position - drop shadow
8. Close white background - crop/resize tag - add copyright/license and name - save as .png
That's it! Thank you for trying my tutorial!
FTU TUT: Timeless

Timeless
This tutorial was written by me on August 10 using PSP X4. All my tutorials assume you have some working knowledge of PSP and/or Animation Shop.
Supplies:
Tube of choice - I'm using the gorgeous art of VeryMany. This tube is one of the Vault images and access is separate from the other images there. You need a license to use and you can get tubes/license and information on The TPP Vault at ThePSPProject.
Scrap kit of choice - I'm using a kit from JRB Scraps. This kit is no longer available, but permission was given to share her scraps before the closing of PTE (if I'm mistaken on this please let me know and I will remove link). You can get download kit here.
Template 149 from Horseplays Pasture. Visit her blog here to download.
Font of choice - I'm using Windsong
To begin open template - Shift+D to duplicate - close original - open tube in PSP and minimize for now
1. On your template click on circle layer - selections - select all - float - defloat - c/p paper of choice as new layer - selections - invert - delete - drop shadow
2. Repeat for other template layers - adding drop shadow as you go
3. Click on circle layer - c/p element 17 as new layer - resize if needed and position to the left of tag just to where you can see the leaves peeking out - duplicate - image - mirror - merge down - duplicate again - image - flip - position on bottom of tag - drop shadow both layers - merge together
4. Click on strip layer - c/p element 4 as new layer - resize - position - drop shadow
5. C/P elements 6, 7, and 8 as new layers - resize - position to make a swag - drop shadow - merge these layers together - duplicate - image - mirror - position - merge - position this along the strip layer
6. C/P element 5 as new layer - resize - position how you want on tag - I placed mine on the left of the swag - drop shadow
7. C/P element 25 as new layer - resize - position on the top right of template ( see my tag) - using your eraser tool remove the parts below the loop so it appears to be hanging on frame - drop shadow
8. C/P element 29 as new layer - resize - position - drop shadow - c/p element 27 - resize - position - drop shadow
9. C/P your tube as new layer - position on tag - drop shadow
10. Close background layer - crop/resize tag - add copyright/name and license - save as .png
Hope you enjoyed my tutorial!
Thursday, August 9, 2012
FTU Tut : Bad Girl

Bad Girl
This tutorial was written by me on August 9 using PSP X4. All my tutorials assume you have some working knowledge of PSP and/or Animation Shop.
Supplies:
Tube of choice - I'm using the amazing art of The Hunter. You must have a license to use this image. You can get his art and license here.
Scrap Kit of choice - I'm using a great kit by Kitts Kreations called Bad Ass Chick. Visit her blog here to find where you can get this kit and her other great designs.
Template - EI Template 71 by Pooker which you can get here.
Font of Choice - I'm using Home Boots which you can get here.
Mura Meisters Tone
Tramages Tow The Line
Penta VTR2
Eye Candy 4 Gradient Glow
Open your tube and minimize for now.
1. Open your template - Shift+D to duplicate - close original - on teal circle - selections - select all - float - defloat- c/p paper of choice - deselect - repeat for grey rectangle layers - delete original layers
2. Choose 2 colors from your tube and make a gradient - on your black angle rectangle layer - selections - select all - float - defloat - new raster layer - flood fill with your gradient - leave selected - effects - mura meisters tone - apply - selections - invert - delete - deselect - repeat for other black angle layer - delete original layers
3. On white circle layer - selections - select all - float - defloat - c/p another paper INTO selection - selections - select none - adjust - add/remove noise - settings your choice - apply
4. On grey circle layer - selections - select all - float - defloat - layers - new raster layer - flood fill with gradient - selections - select none
5. On teal rectangle - selections - select all - float - defloat - layers - new raster - flood fill with black - effects - tramages tow the line - apply - deselect - delete original
6. On black rectangle - selections - select all - float - defloat - new raster - flood fill with your earlier gradient invert checked - leave selected - maximize your tube - mirror - c/p as new layer - position to your liking - selections - invert - delete - selections - deselect - delete original black rectangle
7. On frame layer - selections - select all - float - defloat - c/p another paper of choice - selections - invert - delete - deselect - add same noise as above - delete original
8. Merge your teal strip and white strip together - select - float - defloat - new raster - flood fill with gradient - effects - Penta VTR2 default - select none - delete original
9. Add any elements of your choice resizing and rotating as needed and position around your tag - I weaved them in between the layers - when happy drop shadow your elements and your frame and tube layers
10. C/P your tube again as new layer - position on tag resizing if needed - drop shadow
11. Close out background layer - crop/resize your tag - add copyright/license and your name ( I added a gradient glow to name) - save as .png
Would love to see any results and thank you for trying my tut!
Sunday, May 23, 2010
Tut : Summer Flowers

Summer Flowers
This tutorial was written by me on May 23 using PSP 9. All my tutorials assume you have some working knowledge of PSP and/or Animation Shop.
Supplies:
2 Tubes of choice - I'm using the cute fairies of Joel Adams. You can purchase tubes/license at CILM.
Scrap Kit - I'm using a great FTU kit from Nette's Nightowl Works portion of the Seasons In The Sun blogtrain. Visit her blog to download her part and don't forget to check out the other great parts of this train.
Template - I'm using Template #47 from Sara's Scraps. Visit her blog to download.
Mask of choice
Font of choice - I'm using AL Delight
To begin open tube and mask in PSP - minimize for now - open template in PSP - ShiftD - close original - image - canvas size - 750 x 550 - new raster layer - floodfill white - send to bottom - close out copyright
1. Click rectangle 1 with magic wand - copy/paste Paper 5 as new layer - selections - invert - delete - select none - dropshadow - delete original layer - repeat for other template layers using different papers
2. Highlight your frame background layer - selections - select all - float - defloat - c/p first tube as new layer - resize - position on left side of background layer - selections - invert - delete on tube layer - change properties to luminance(l) - mirror your tube - repeat steps for other side of background - dropshadow tube layers.
3. C/P cherry 2 as new layer - resize - position on right side of frame layer - dropshadow
4. C/P Flower 2 and Flower 4 as new layers - resize one smaller than the other - position on left side of frame layer - dropshadow
5. C/P your other tube as new layer - resize - position on tag - dropshadow
6. C/P dragon 2 as new layer - image - mirror - rotate - resize - position on top left of frame layer - dropshadow
7. On white floodfill layer - c/p doodle 33 as new layer - resize - position - duplicate - image - mirror - image - flip - merge together - adjust - add/remove noise - add noise 100% - dropshadow
8. C/P sunflower 3 as new layer - position behind your circle - resizing if needed - dropshadow - duplicate - image - mirror - image - flip - position ( see my tag)
9. C/P Flower as new layer - resize - position on right side of template ( see my tag) - dropshadow
10. Back on floodfill layer - c/p paper of choice as new layer - apply mask - merge group - close out white background - crop/resize tag to your preference - add copyright/license and name - save as .png
Monday, April 12, 2010
Tut: Garv's Girl

Garv's Girl
This tutorial was written by me on April 12, 2010 using PSP 9. All my tutorials assume you have some working knowledge of PSP.
Supplies:
Tube of choice - I'm using the ever awesome Keith Garvey. Do not use this image without the proper license. You can purchase tubes/license at MyPSPTubes.
Scrap Kit - I'm using a great FTU kit called "Garv's Girl" from Tamie at Addictive Pleasures. Visit her blog to download.
Mask of choice - I'm using CM Mask 3 from Vicky. You can download this mask from Creative Misfits. Click on Masks on the right side of page and scrolldown to Week 3 mask challenge Diamonds.
Font of choice
Filters - DSB Flux Bright noise & Eye Candy 5 Textures
Animation Shop
Open your tube & mask in PSP - minimize for now
1. Open new image 700 x 700 white - copy/paste Paper 1 as new layer - go to layers - new mask layer - from image - find your mask in dropdown - ok - merge group - copy/paste Paper 8 as new layer - apply your mask again - merge group - rotate this mask layer left 45 - merge down to other mask layer
2. Copy/paste Wire 2 as new layer - copy/paste Notepaper as new layer - resize - rotate left 30 - position - dropshadow - choose a script font write out a message - rotate left 30 - position on notepaper - convert to raster and merge down to notepaper
3. Copy/paste Glitter Splat 2 as new layer - resize - position in top right corner of tag - duplicate - image - mirror - image flip - merge down - dropshadow - duplicate this layer for a total of 3 - on bottom glitter layer - effects - dsb flux - bright noise settings 50 click mix 1x - on second layer - repeat effect, but click on mix 2x - on top layer repeat but click on mix 3x - close out top 2 glitter layers
4. Copy/paste Stars as new layer - position in top left corner of tag - duplicate - image - mirror - image - flip - dropshadow both layers - merge duplicate layer down
5. Copy/paste Bow 4 as new layer - resize - position in the center towards the top of the wire star ( see my tag) - dropshadow - copy/paste Button 2 as new layer - resize - position in center of bow - dropshadow
6. Copy/paste Staple as new layer - resize - position so it looks like the paper is stapled to the bow ( see my tag) dropshadow
7. Copy/paste Plate as new layer - resize - position in the center at the bottom of the wire (see my tag) - dropshadow - duplicate for a total of 3 layers
8. Here comes the tricky part - using your magic wand click inside the letters on the plate while holding down the shift key - when you have all the letters outlined with your "ants" on the original layer making sure it is highlighted- effects - Eye Candy 5 Textures - texture noise - default settings - apply - click on your undo button - close the original and open the first duplicate layer making sure it is highlighted - repeat filter but hit your random seed button 1x - apply - open 2nd duplicate layer making sure it is highlighted and close the other - repeat filter clicking on random seed again - apply. Close out the duplicates and open original layer
9. Copy/paste Heart 2 as new layer - resize - position on bottom right of plate - duplicate - rotate the duplicate layer to the left 15 move down just a bit - dropshadow both layers
10. Copy/paste your tube of choice as new layer - resize -dropshadow and position
11. Close out background layer - crop/resize your tag to your preference - add copyright/license info and name - open background layer again
Animation
1. Open Animation Shop - In PSP making sure your original animation noise layers are open - edit copy merge - back in Animation Shop paste as new Animation - in PSP close those 2 layers and open the 1st duplicate layers - edit - copy merge - Paste after current frame - repeat these steps for the next layers . You should now have 3 frames in Animation Shop - go to edit - select all - animation - frame properties - change to 20 - play your animation. Save as .gif.
That's it! Thank you for trying my tutorial!!
Tut: Beloved Memories

Beloved Memories
This tutorial was written by me on April 12, 2010 using PSP9. All my tutorials assume you have some knowledge of PSP.
Supplies:
Tube of choice - I'm using the beautiful work of Zindy Nielsen. Do not use this image without a proper license. Visit Zindy's site here to purchase a license/tubes.
Scrap kit - I'm using Samantha from Sweet Indulgence's portion of the Beloved Memories blog train. You can download here and please visit the other designers on this great train to get their part.
Mask & Font of choice
This is a real easy tutorial so let's begin:
Open your tube & mask in PSP and minimize for now.
1. Open a new image 700 x 700 white background - copy/paste a Paper of choice as new layer - layers - new mask layer- from image - find your mask in dropdown - click ok - merge group
2. Copy/paste Element 3 as new layer - click inside frame with magic wand making sure you get the parts around the bow - selections - modify - expand by 5 - copy/paste another paper - selections - invert - delete - move this paper layer below frame - selections - select none
3. Copy/paste your tube as a new layer and move below frame layer - duplicate and move duplicate above frame layer - on bottom tube erase any part of the tube showing below frame - back on top tube - erase any parts you don't want showing here - dropshadow bottom tube layer
4. Copy/paste Element 12 as new layer - rotate just a bit to the right using your deform tool - arrange on left side of frame - duplicate as many times as you want and arrange along the frame - merge these layers together - dropshadow - duplicate - image - mirror - arrange on right side of frame - dropshadow both layers
5. Copy/paste any other elements you wish and arrange around your tag resizing as needed - dropshadow each element
6. Copy/paste Word Art of choice - add a slight gradient glow - dropshadow
7. Close background layer - crop/resize tag to your preference - add copyright/license number & name - save as .png
Thursday, April 8, 2010
Tut: Bettie Davis Eyes

Bettie Davis Eyes
This tutorial was written by me on April 8, 2010 using PSP9. All of my tutorials assume you have some working knowledge of PSP.
Supplies:
Tube of choice - I'm using the gorgeous work of Keith Garvey. Do not use this image without a license. Visit MyPSPTubes to purchase one.
Scrap kit - I'm using Alika's portion of the '80s Blog Train. Visit her blog here to download and follow the rest of this awesome train.
Template - I'm using Cora's bonus portion of the '80s Blog Train. Visit her blog here to download.
Mask of choice - I'm using Mask 32 from Babes Designz . Visit her blog to download.
Font of choice - I'm using Satisfaction
Musical note floatie which you can download here. Scroll down just a bit..there are alot of great floaties here.
Animation Shop
Open tube & mask in PSP and minimize for now.
1. Open template - ShiftD - close original - image - resize, all layers checked , 75% - image - canvas size - 750 x 550
2. New raster layer - move to bottom - floodfill white - copy/paste Paper of choice as new layer - layers - new mask layer - from image - find your mask in dropdown box - apply - merge group
3. Copy/paste Wire as new layer - resize just a bit - move to the top of canvas - duplicate - image flip - position - merge down
4. On Raster 1 - selections - select all - copy/paste paper as new layer - selections - invert - delete - selections - select none - adjust - add/remove noise - add noise , uniform, monochrome checked 100% - dropshadow - delete original layer
5. Repeat Step 4 for Raster 3, copy of Raster 3, and Raster 5
6. On Raster 2 - selections - select all - float - defloat - copy/paste paper of choice as new layer - selections - invert - delete - selections - select none - delete original layer
7. Back on Raster 4 - selections - select all - float - defloat - copy/paste another paper as new layer - selections - invert - delete - select none - dropshadow - delete original layer - repeat for copy of Raster 4
8. Click on your circle paper layer - copy/paste frame of choice as new layer - resize - click inside frame openings with your magic wand ( hold down shift key) - selections - modify - expand by 5 - copy/paste another paper as new layer - selections - invert - delete - leave selected - copy/paste your full tube as new layer - delete - selections - select none - move paper layer and tube below frame layer - dropshadow tube and frame
9. On Raster 6 - selections - select all - float - defloat - copy/paste another paper - selections - invert - delete - leave selected - copy/paste your closeup tube as new layer - delete - selections - select none - dropshadow tube
10. On Raster 8 - layers - merge down - choose a color from your tag & make note of hue and saturation - adjust - hue/saturation - colorize using the settings you chose - dropshadow
11. Choose 2 flowers - copy/paste as new layers - resize both - position on tag - dropshadow both layers
12. Copy/paste guitar of choice as new layer - resize - rotate to the left just a bit - position so it appears to be leaning on your closeup layer - dropshadow
13. Copy/paste Brad of choice as new layer - resize - position on the top center of your frame layer (see my tag) - dropshadow
14. Close background layer - crop/resize tag to your preference - add copyright/license and name - open background layer again - If you are not going to animate you are done - save as .jpg or if you want a clear background leave the white layer closed and save as .png. For the animation see below:
Animation
Open Animation Shop and open your floatie animation - Edit - Select all - animation - reverse frames - Back in PSP - Edit - Copy Merged - in Animation Shop - Edit - Paste as New Animation - duplicate your tag for a total of 9 frames - edit - select all - on blinkie animation - copy - on tag animation - edit - paste into selected frame - position so it appears notes are coming from the guitar - repeat once more and arrange ( See my tag) - Play your animation and if happy save as .gif ( If you don't like it just hit undo and repeat the steps until you are)
Tut: 100% Goth Chic

100 % Goth Chic
This tutorial was written by me on April 8, 2010 using PSP9. All my tutorials assume you have some knowledge of PSP.
Supplies:
Tube of choice - I'm using Elias Chatzoudis' Limited Edition tube that is no longer available. Do not use any of his images without a proper license. You can visit MyPSPTubes to purchase tubes/license.
Scrap kit - I'm using Nette's part of the Goth Chic blog train. You can visit her blog Nette's Nightowl Works to download and follow the rest of the train.
Mask of Choice - I'm using WSL Mask 221 from Chelle. You can visit her blog here to download. Just look to right and you will find the download links to her masks.
Font of choice - I'm using Jayne Print which you can get from Dafont.
Open your tube, mask, and supplies in PSP and minimize for now - new image - 700 x 700 white
1. Copy/paste Paper 3 as new layer - use your deform tool to stretch to cover your canvas if needed - layers - new mask layer - from image - find your mask - apply - merge group
2. Copy/paste SpatterFrame3 as new layer - resize if needed - position in the center of your canvas - arrange your mask layer behind your frame layer how you want - dropshadow frame
3. Copy/paste your tube as new layer - resize if needed and position over frame opening - dropshadow
4. Copy/paste Heart element as new layer - resize - position to the top right of frame layer - dropshadow - copy/paste 2 eggs of choice as new layers - resize - position over top of heart element rotating to your preference - adjust - sharpen - adjust -sharpen more - dropshadow
5. Copy/paste Bunny as new layer - resize - position on the bottom left corner of tag - dropshadow
6. Copy/paste Label of choice - resize - move below frame layer and up to where it is just touching the bottom of your tube - dropshadow
7. Close background layer - crop/resize your tag to your preference - add copyright/license and name - save as .png.
Monday, April 5, 2010
Tut: Caitlyn's Garden

Caitlyn's Garden
*This tutorial is dedicated to my daughter Caitlyn whose 2 favorite things are butterflies and flowers*
Written by me on April 5, 2010
Supplies:
Tube of choice : I'm using the adorable fairies of Karen Middleton. Do not use this image without a license. You can get one here at CILM.
Scrap Kit : I'm using "In The Garden With Grandma". A FTU kit from Nette's Nightowl Works. Visit her blog here to download. Click on Freebies and scroll down. She has some beautiful freebies!
Font & Mask of choice
1. Open new image 700 x 700 white
2. Copy/paste Oak4AllSeasons as new layer - resize - position towards the top right of tag - adjust - sharpness - sharpen - dropshadow
3. Copy/paste Butterflies - Scatter as new layer - resize - adjust - sharpness - sharpen - move to the top of tag ( See mine for reference) dropshadow
4. Copy/paste flowerbox as new layer - resize - adjust - sharpness - sharpen - move to the left side of tag - duplicate - image - mirror - move so that it is touching the other flowerbox - layers - merge down - dropshadow
5. Copy/paste arched fence as new layer - resize - position - adjust -sharpness - sharpen - dropshadow
6. Copy/paste agapanthas as new layer - resize - position along the bottom of the fence - duplicate as many times as needed and arrange (see my tag) - merge these layers together - dropshadow
7. Copy/paste mailbox as new layer - resize - arrange on tag - adjust - sharpness - sharpen - dropshadow
8. Copy/paste your tube as new layer - resize if needed - arrange - dropshadow
9. Click on background layer - click on your tube tool and find your lawn tube ( comes with program - I'm using PSP 9 so yours maybe different) - new raster layer - apply the tube to your layer - duplicate this layer as many times as needed and arrange around your tag ( see mine for reference) - merge your lawn layers together
10. Back on background layer - copy/paste paper 1 as new layer - merge your lawn layer down to this paper layer - Open your mask - minimize - layers - new mask layer - from image - find your mask - apply - merge group
11. Close background layer - crop/resize your tag to your preference - add copy/right and name adding a slight dropshadow to name - save as .png
Friday, April 2, 2010
Tut: Vintage Elias

Vintage Elias
This tutorial was written by me on April 2, 2010
Supplies:
Tube of choice - I'm using the art of Elias Chatzoudis. If you wish to use the same image you must purchase a license to do so. You can get one here at MyPSPTubes.
Scrap Kit - I'm using a cute freebie kit from Alika's Scraps called "Magical Creatures". Visit her blog here to get this kit.
Template - I'm using a collab template from Stormy & Rose. You can download this template at Creative Misfits Creations.
Filters - Xero Porcelain
Font of choice - I'm using The Nautigal
Open template and tube in PSP - minimize your tube
1. Shift + D do duplicate your template - close out original - image - canvas size 750 x 700 - click on background - floodfill white
2. Delete info and word art layers - On Black Square layer - selections -select all - float - defloat - copy/paste paper of choice from kit - selections - invert - delete - delete original layer -add a slight gradient glow
3. Repeat Step 2 for all layers - when you get to the glitter layer - adjust - add/remove noise - add noise - settings gaussian, monochrome checked - 100 - repeat - dropshadow
4. Back on your bottom square layer - move up to below other square layers - merge these 3 layers together - click on each square layer with your magic wand while holding down Shift key - copy/paste your tube in the first square - position what part you want to show - selections - invert - delete - repeat for next 2 squares hitting delete on each individual layer ( no need to invert selections) - selections - select none - effects - Xero - Porcelain with the following settings:

5. Repeat for each tube layer - merge tube layers together - merge down to square layer -add a slight gradient glow using a color from tag
6. Copy/paste any elements that you want - resizing each - position around your tag - dropshadow each layer
7. On background layer - copy/paste Pearls 1 as new layer - resize - position to the left of tag - duplicate - image - mirror - copy/paste Pearls 2 as new layer - resize - position in center of the 2 Pearl circles - move below Copy of Pearls 1 layer - merge together - dropshadow
8. Back on top layer - copy/paste your tube again - move to the right side of tag - duplicate - image - mirror - position - dropshadow both layers
9. Close white background layer - crop/resize tag to your preference - add copyright/license info & your name - save as .png
That's it! Thank you for trying my tutorial!!
Thursday, April 1, 2010
Tut - Like A Virgin

Like A Virgin
This tutorial was written by me on April 1, 2010
Supplies:
3 tubes of choice - I'm using the ever amazing work of Keith Garvey. Do Not Use without a license. You may get one at MyPSPTubes.
Scrap Kit - I'm using Stina's portion of the '80's Flashback Blog Train. Visit her blog here to download and don't forget to visit the rest of the train.
Template - I'm using Cora's Bonus from the '80's Flashback Blog Train. Visit her blog here to download and get her part of this great train.
Filters: Xero Porcelain
Font of choice: I'm using one called BD Miami
1. Open your supplies in PSP and minimize everything but the template
2. On Template - image - resize 75% all layers checked - smartsize - image - canvas size 700 x 700
3. Choose a color from your kit - click on it in your color pallet and make a note of the hue & saturation - close - click on Raster 1 - adjust - hue/saturation - colorize with those settings - add dropshadow
4. On Raster 2 - selections - select all - float - defloat - copy/paste a paper of choice - selections - invert - delete - select none
5. On Raster 4 - selections - select all - float - defloat - copy/paste another paper - selections - invert - delete - dropshadow
6. Repeat for Rasters 3 & Copy of Raster 3
7. Repeat Step 3 using a different color and colorize Rasters 5 & 6 - add dropshadow
8. Back on Raster 4 using selection tool - point to point setting - outline the opening - copy/paste another paper as new layer - selections - invert - delete - move below Raster 4
9. On Raster 3 - using selection tool - same settings as above - outline frame opening - new raster layer - floodfill with a color that matches your frame - move below frame layer - copy/paste first tube of choice - position - selections - invert - delete on tube layer - selections - select none - dropshadow - effects - xero - porcelain default - Repeat for Copy of Raster 3 layer using another tube
10. Add main tube image - position - dropshadow
11. Now for the fun part! Add any other embellishments you want - This is a fun kit and lots of possibilities. When satisfied - add dropshadow to each element.
12.Crop/resize tag to your preference - add copyright/license & name - save as .png.
That's it! Thank you for trying my tut!!
Monday, March 29, 2010
Tut: Cerridwen

Cerridwen
Supplies:
Tube of choice - I'm using the beautiful fantasy art of Jessica Galbreth. Do not use this image without proper license. You can get a license and tubes at CILM.
Scrap Kit - I'm using "The Pagan Way" a PTU kit from Gothic Witch. Visit her blog here to find out where to get this amazing kit!
Font of choice - I'm using "Witched" which you can download at Dafont
Filters: Eye Candy 5 "Textures" - Texture Noise
Animation Shop
1. Open a new image 700 x 700 white
2. Copy/paste Frame 3 - resize - click inside frame with magic wand - selections - modify - expand by 3 - selections invert - copy/paste paper of choice - delete - selections - select none - move paper layer below frame - dropshadow frame layer
3. Copy/paste altar 1 as new layer - resize - position on bottom right of tag - dropshadow
4. Open candles 2, 4, & 7 - resize - copy/paste each one as new layer - position on altar ( see my tag for placement) - adjust - sharpness - sharpen - dropshadow each candle layer
5. Copy/paste Pentagram 4 - resize - position on top right corner of tag - I arranged my layers to where the pentagram appeared to be hanging centered above the altar layers - adjust - sharpness - sharpen - dropshadow
6. Copy/paste your tube as a new layer - position to your liking - dropshadow
7. Click on background layer - copy/paste Mesh 4 as new layer - using deform tool rotate to the left slightly
8. Copy/paste Pentdoodle of choice as new layer above Mesh layer - dropshadow
9. Back on background layer - copy/paste Splatter 1 as new layer - position
10. Crop/resize your tag to your preference - add copyright and name - If not animating you can stop here -
If you are animating see the steps below:
Animation:
Click on your Splatter layer and duplicate for a total of 3 layers - close out the top 2 layers - effects - Eye Candy 5 Textures - Texture noise with the following settings:

Repeat for each layer hitting random seed each time - Open Animation Shop - Back in PSP - Make sure the top 2 Splatter layers are closed and you are on an open layer - edit - copy/merged - Paste as new animation in Animation Shop - repeat for other 2 layers opening and closing the layers as needed. Run animation . If happy save as .gif.
That's it!! Thank you for trying my tut!
Tut: Flirty Gemini - Animated

Flirty Gemini
Supplies:
Supplies:
Tube of choice : I'm using the Gemini tube from Ismael Rac. Do not use this image unless you have a license to do so. You can purchase his tubes/license at Artistic Minds.
Gemini Template from Vaybs. Visit her blog here to download.
Scrap Elements: Xeracx Zodiac kit from Stu at CreativeCrazyScraps. Click on freebies to find the kit!
Filters: DSB flux - Bright Noise
Mask & Font of choice
Animation Shop
1. Open up template in PSP - close copyright layer - image - canvas size - 700 x 700 - click on raster 1 and floodfill white
2. Click on Raster 12 - selections -select all - float - defloat - new raster layer - floodfill with color from tube - adjust - add/remove noise - add noise - settings 100 - repeat filter - dropshadow
3. Click on copy of Raster 10 - selections - select all - float - defloat - new raster layer - choose 2 colors from tube and make a gradient with these settings: angle 45, repeats 1 - floodfill with gradient - effects - texture effects - weave with the following settings:

4. Click on Raster 15 - selections - select all - float - defloat - new raster - floodfill with lighter color from tube - add same noise effect as above, but only 1 time - add a gradient glow of your choice to this layer
5. Leave Raster 14 & Raster 7 as is and click on copy of Raster 7 - selections - select all - float - defloat - new raster layer and floodfill with your gradient except invert checked - leave selected
6. Copy/paste your tube as new layer - position over left circle - selections - invert - delete - selections - deselect - duplicate your tube layer - image - mirror - merge these 2 layers together & duplicate
7. On the duplicate layer - adjust - blur - gaussian 3 - change properties to soft light - on original tube layer change properties to Luminance (L)
8. On Raster 6 - selections - select all - float - defloat - new raster layer - floodfill black - leave selected - copy/paste your tube as new layer - position - selections - invert delete - repeat for other square ( I focused on her necklace and Gemini wording on tshirt)
9. Dropshadow frame layer (Raster 11)
10. Click on Raster 8 - selections - select all - float - defloat - new raster layer - floodfill with gradient - Selections - Select none - Repeat for Copy 2 of Raster 6 except invert unchecked
11. Click on Raster 10 - Selections - Select all - new raster layer - floodfill black - selections - select none - dropshadow
12. On copy of Raster 2 ( figures layer) add same noise filter as step 2
13. Merge figures layer, zodiac symbol frame and layer, gemini wording, and raster 8 together - dropshadow - move towards bottom of tag ( see mine for placement)
14. Copy/paste main tube as new layer - move below your merged layer - erase any bits that you don't want showing - dropshadow
15. Click on background layer - new raster layer - flood fill with your gradient - new raster layer - add some wording of choice - I chose various traits of the Gemini sign - merge this layer down - add mask of choice - merge group
16. Back on top layer - copy/paste bow of choice - colorize to match your tube - resize - position - dropshadow
17. Click on mask layer - copy/paste diamonds as new layer - resize - move to left side - duplicate - image - mirror - image - flip - merge down
18. Crop/resize tag to your preference - add copyright/license and name - If you are not going to animate you're done! If you are see steps below:
Animation:
1. Click on your diamonds layer and duplicate for a total of 3 layers - on bottom layer - effects - dsb flux - bright noise 50 - click mix one time - apply - repeat for next 2 layers clicking mix 2x then 3x appropriately.
2. Open animation shop - back in PSP make sure your top 2 diamond layers are closed and you are on an open layer - edit - copy merged - back in Animation Shop - Edit - paste as new animation - Back in PSP - close bottom diamond layer - open next - repeat steps into Animation Shop - Finally, repeat for last diamond layer
3. Play animation and if happy save as GIF!
That's it!! Thank you for trying my tut!!Thursday, March 25, 2010
Tut: Rumpalicious

Rumpalicious
Supplies:
Brunette & Kylie Collab Template from Creative Misfits Creations
FTU Scrap Kit "Spring Garden" from Fantasy Moments
Tube(s) of choice ( Full and CU )- I'm using the gorgeous work of Jose Cano. You can purchase a license and his tubes at MyPSPTubes
Mask of Choice
Font of Choice
1. Open template in PSP - Shift D - Close original - Image - Canvas Size - 800 x 700 (we'll crop/resize later) - delete copyright layer
2. Merge your Top & Bottom Grey Circle layers together - selections - select all - float - defloat - copy/paste paper of choice from kit - selections - invert - delete - select none - Dropshadow
3. Click on Colored Circle layer -adjust - add/remove noise - uniform, monochrome checked - 100% -Dropshadow
4. Choose 2 colors from your tube and create a gradient with these settings: linear - angle 45 - repeats 3
5. Click on Black Circle - selections - select all - float - defloat - new raster layer - floodfill with your gradient - leave selected
6. Using your CU image - copy/paste as new layer over your gradient layer - position - selections - invert - delete - change properties to Luminance (L) and opacity to around 40-45 - selections - select none - Dropshadow
7. Click on Top White Square - Selections - Select All - Float - Defloat - Copy/paste another paper from kit - Selections - Invert - Delete - Adjust - Add/Remove Noise with same settings as above - deselect - Repeat for Middle & Bottom White Layers - Dropshadow
8. Click on Top Colored Square - Selections - Select All - Float - Defloat - New Raster - Floodfill with your gradient except this time click invert on gradient tab - Repeat for Middle & Bottom Colored Squares - Using magic wand click on the original Colored Square layers ( all 3 should be selected) - new raster layer - move above Bottom Colored Square - Effects - Mura Meisters - Tone -Default - apply - deselect
9. Click on original Top Colored Square again - selections - select all - float - defloat - using your full tube copy/paste as new layer - position so the part you want showing is in the frame - selections - invert delete - deselect - dropshadow - Repeat for the Middle and Bottom Colored Squares.
10. Add any elements you want from the kit to your tag now - resize as needed and dropshadow
11. Copy/paste your full size tube and position on your tag - dropshadow
12. Click on your background layer - floodfill with white - copy/paste another paper and apply mask of choice - merge group - close white background layer - crop - merged opaque - adjust crop as needed - apply
13. Add copyright/license information and your name - you can either leave background layer closed and save as .jpg or leave it closed and save as .png
That's it! Thank you for trying my tut!!
Monday, March 22, 2010
Tut: Vixen

Vixen
Supplies:
Tube(s) of Choice - I am using the gorgeous art of Legend's Art. You can purchase his tubes and license at MyPSPTubes.
Vixen Template - Template from Tammy & Cakes. This is part of the Collab Template Challenge at Misfits Creations. You can download from their blog here.
Scrap Kit of choice - I'm using Gothic Inspirations part of the Dark Cravings Blog Train. You can download Jessica's portion here. Click on Freebies and scroll down. Don't forget to check out the other great kits in this train.
Font of choice ( I'm using LainieDaySH which you download at UrbanFonts).
Eye Candy 4000
To Start:
1. Open up template in PSP - Shift D to duplicate - Close original - Image - Canvas Size - 800 x 800 (Don't worry, we'll crop and resize later).
2. Close Raster 24 & Copyright layer by clicking on the eye in your layers pallet.
3. Click on Vector 4 (Bottom Layer) - Adjust - Add/Remove Noise - Add Noise - 100% Uniform & Monochrome Checked - Okay - Repeat - Drop Shadow
4. Click on Vector 2 - Selections - Select All - Float - Defloat - Copy/Paste Paper of Choice from kit - Selections - Invert - Delete - Select None - Delete Original layer
5. Add slight drop shadow to Raster 23 (text layer)
6. Click on Raster 9 and Repeat step 4 using a different Paper. Add same Noise as above, but only do once - Drop Shadow.
7. Click on Raster 8 - Repeat Step 3 above - Drop Shadow
8. Go to Raster 10 and Repeat Step 6 - Drop Shadow - Delete Original Layer
9. Click on First Box layer - Selections - Select All - Float - Defloat - Add another paper - Invert - Delete - Leave Selected
10. Copy/Paste Tube of choice - arrange until part you want showing is where you like it (You may have to resize a bit depending on your tube) - delete on tube layer - Selections - Deselect - Change properties to Luminance (L)
11. Click on next Box layer - Repeat steps 9 and 10 using a different part of tube - Do the same for the last Box layer.
12. Click on Raster 5 - Add same noise as Step 3 - Drop shadow
13. Click on Lines layer - Selections - Select All - Float - Defloat - Copy/Paste using another paper of choice - Selections - Invert - Delete - Select none - Effects - Tramages - Tow The Line - Default settings - Apply - Do the same for Raster 3 except add a drop shadow to this layer.
14. Merge your splat layers together and add same noise as above - Drop Shadow
15. Click on Word Art layer - Adjust - Hue/Saturation - Colorize to match your tag - Effects - Eye Candy 4000 - Gradient Glow - Basic Settings 3-25-100 - Color Fat - Add Drop Shadow - I moved mine down a bit on my tag ( See tag for reference)
16. Merge rasters 13 & 14 together - selections - select all - copy/paste paper of choice - selections invert - delete - select none - drop shadow - delete original layer
17. Now for the fun part! Copy/paste any elements of choice - Go crazy and have fun - I then cropped and resized my tag before adding my main tube image - just make sure you leave enough room for it
18. Copy/paste main tube and position - drop shadow
19. Add another raster layer and drop to bottom - resize by 85% - arrange to the left of tag - duplicate - image - mirror - image - flip -arrange
20. Resize once more - add copyright/licensing information & your name - save as .png
That's it - You're done - Thank you for trying my tut!
Subscribe to:
Posts (Atom)
About Me

- Risha
- Vernon, Florida, United States
- Hello! I'm a SAHM of 2 beautiful children Wyatt & Caitlyn and have been married to my wonderful husband Everett for 9 years. I live in a small town in NW Florida and am owned by several miniature dachshunds. I've been PSPing for 7 years now and just now decided to put my tags into tutorial form. When I'm not busy taking care of my various animals which not only is dachshunds, but includes various types of fowl and poultry I am playing with my kids or at my computer.
Licensing


