Grab My Blinkie

Favorite Scrap Stores


Showing posts with label Halloween. Show all posts
Showing posts with label Halloween. Show all posts
Friday, September 28, 2012
EmoWeen
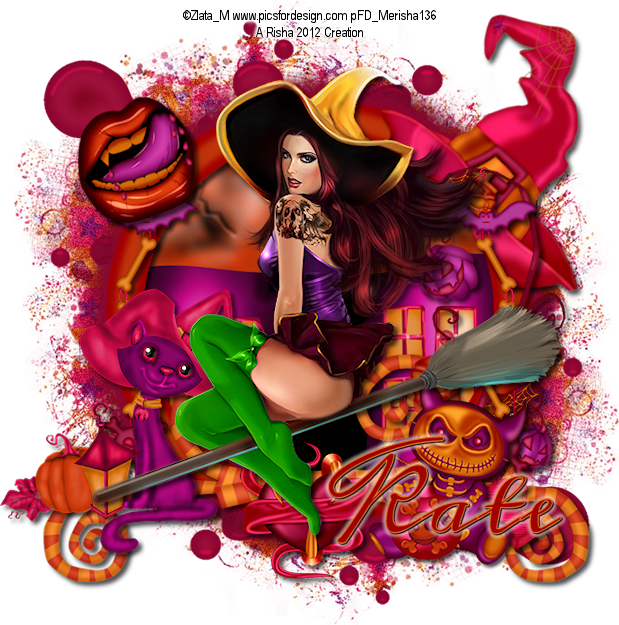
EmoWeen
This tutorial was written by me on September 28 using PSP X4. All my tutorial assume you have some working knowledge of PSP and/or Animation Shop.
Supplies:
Tube - I'm using the art of Zlata_M. You must have a license to use her images and you can purchase this tube and license at PFD.
Scrap Kit - I'm using a great kit from Irish Bitch Designs called "EmoWeen". Visit her blog HERE to find out where you can purchase this great kit.
Mask of choice
Font - I'm using Meddon
To begin open your tube and mask in PSP and minimize - Open a new 700 x 700 image white background
1. Copy/paste Frame 3 as a new layer - center in canvas - click inside with magic wand - selections - modify expand by 6 - layers - new raster layer - flood fill black - move below frame layer - copy/paste House as a new layer - resize and position on left side in frame - duplicate - move this layer to right side in frame - selections - invert - tap delete on keyboard - repeat for other house layer - selections - select none - drop shadow frame and house layers
2. Copy/paste Hat as a new layer - resize and rotate - position on top right of frame ( see my tag) - duplicate - move duplicate layer below your paper layer - back on original Hat layer - using eraser tool remove enough of the hat to make it appear that it is resting on the frame ( again see my tag) - drop shadow the bottom hat layer only
3. Copy/paste Swirl as a new layer - resize and rotate - position on the bottom left of frame - duplicate - image - mirror - drop shadow both layers - copy/paste Clawed Heart - resize and position in center of 2 swirls - drop shadow
4. Copy/paste Tree as a new layer - resize and position on right side of tag - drop shadow - copy/paste Bone String as a new layer - resize and position on left side of frame - duplicate - image - mirror - drop shadow both layers
5. Copy/paste any other elements of choice as a new layers - resizing and positioning around your tag - drop shadow each layer
6. Copy/paste your tube as a new layer - resize and position on tag - drop shadow
7. On white background layer - copy/paste Eye Drip as a new layer - resize and position towards the top left corner of canvas - duplicate - image mirror then flip - drop shadow both layers
8. Back on white background - copy/paste paper of choice as a new layer - layers - new mask layer - from image - apply mask and delete original mask layer - merge group
9. Close out white background - crop/resize tag - add copyright/license info and name - save as .png
That's it! Thank you for trying my tutorial!!
Thursday, September 20, 2012
Trick And Treat
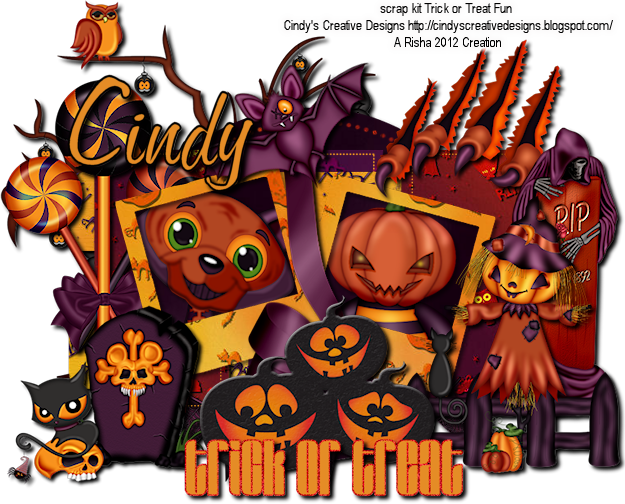
Trick And Treat
Supplies
Scrap Kit - I'm using an adorable kit by Cindy's Creative Designs called " Trick or Treat Fun". You can purchase this kit at Butterfly Blush Designs.
Template - I'm using a collab Halloween template from Kandi and Dee. You can download HERE.
Font - I'm using Fangtasia
To begin open your template in PSP - Shift + D to duplicate - close out original and delete the following layers: info, wordart shadow, and overlay - Go to image - canvas size - 800 x 700 flood fill white
1. Beginning with purple circle layer - selections - select all - float -defloat - copy/paste a paper of choice as a new layer - selections - invert - delete - selections - select none - delete original raster layer - repeat these steps skipping the polaroids layer (we'll do that in the next step) - drop shadow heavy color black
2. On the polaroids layer - click inside the purple with magic wand - selections - modify - expand by 1 - hit delete on keyboard - leave selected and copy/paste another paper as a new layer - selections - invert - delete - move paper layer below polaroid frame - copy/paste cat 3 as a new layer - resize and position in frame - tap delete - copy/paste kid 2 as a new layer - resize and position in other frame - tap delete - selections - select none - drop shadow cat and kid layers
3. Back on polaroids layer - using magic wand click on white frame - copy/paste another paper as a new layer - selections - invert - delete - selections - select none - delete original polaroids layer - drop shadow your frame
4. Merge your word art layers together and it is time to go crazy!! Add any elements you want, resizing and positioning around your template - drop shadow each layer as you go
5. When you are happy close out white background - crop/resize your tag ( I resize to 625 pixels on longest side) - add any copyright/license info ( if you used a PTU tube, if not credit the scrap kit designer) - save as .png
That's it!! Simple wasn't it!! Would love to see what you do with my tutorial!!
Witches & Ghosts, Oh My!!
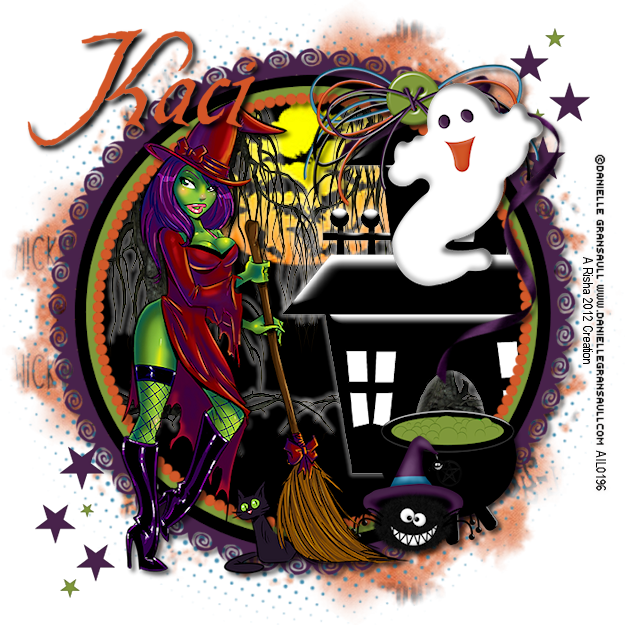
Witches & Ghosts, Oh My!!
Supplies:
Tube - I'm using the art of Danielle Gransaull. You must have a license to use her art. You can purchase tubes/license at AIL.
Scrap Kit - I'm using a great PTU kit by Scrappin' Krazy Designs called " One Trick Witch". Visit Kaci's blog HERE to find out where to purchase.
Mask of choice
Eye Candy 5 - gradient glow
Font - I'm using Be Safe
To begin open your tube and mask in PSP - minimize for now - open a new 700 x 700 image white background
1. Copy/paste frame 1 as a new layer - resize and center in canvas - click inside with magic wand - selections - modify - expand by 6 - layers - new raster layer - floodfill black - move below frame layer - selections - invert - leave selected
2. Copy/paste the following, resizing as desired, and position inside frame : bats, haunted house, tree 1 - hit delete on keyboard on each layer - selections - select none - add a light gradient glow to each layer color white ( you can also drop shadow each layer changing color to white)
3. Click on frame layer - copy/paste any other elements you desire and position around your frame - resize if needed and drop shadow - have fun! There are lots of amazing elements to work with
4. On white background - copy/paste halftone as a new layer - using pick tool stretch slightly larger than frame
5. Copy/paste stars as a new layer - resize and position to the top of canvas - duplicate - image - flip - drop shadow both layers
6. Back on white background - copy/paste a paper of choice as a new layer - layers - new mask layer - from image - apply your mask and delete original mask layer - merge group
7. Close out white background - crop/resize tag ( i resize to 625 pixels on largest side) - add copyright/license info and name - save as a .png
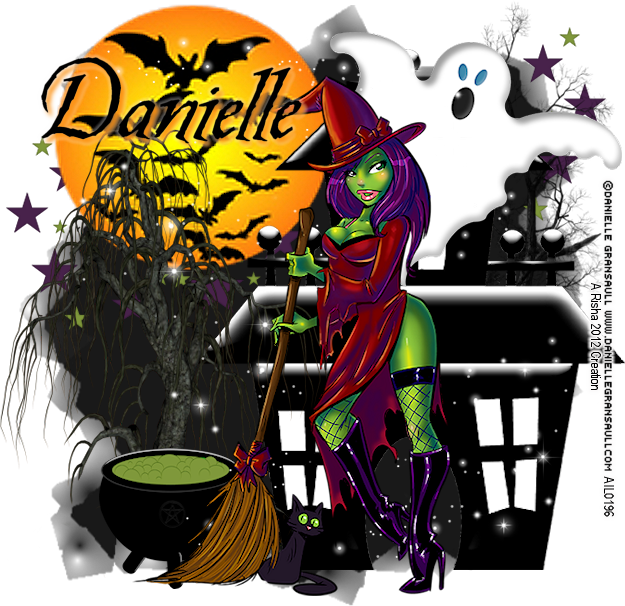
Here is another tag I did using the same tube and kit:
Tuesday, September 18, 2012
Enchanted
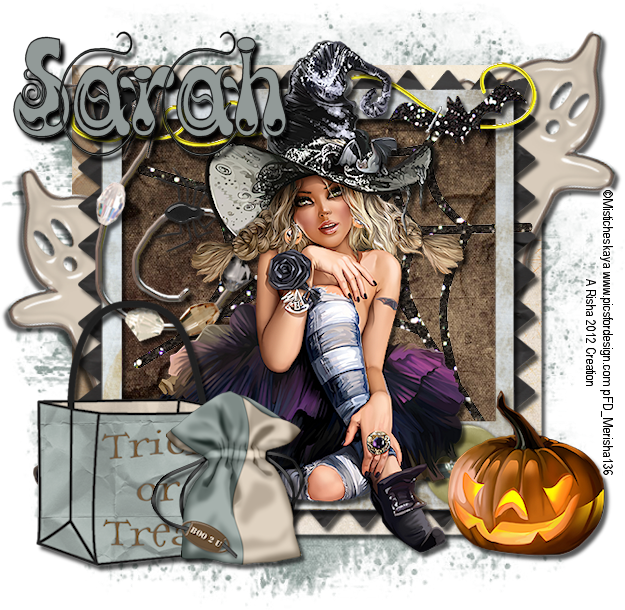
Enchanted
This tutorial was written by me on September 18 using PSP X4. All my tutorials assume you have some working knowledge of PSP and/or Animation Shop.
Supplies:
Tube - I'm using a beautiful tube from Misticheskaya. You need a license to use her art and you can purchase tubes/license at PFD.
Scrap Kit - I'm using a great PTU kit from Designs by Sarah called " Boo 2 U". You can purchase this kit at PMTw/S.
Mask of choice
Font - I'm using Kingthings Slippery Lip
To begin open your tube and mask in PSP - minimize for now - new 700 x 700 image white background
1. Copy/paste grunged frame as a new layer - center in canvas - copy/paste folded frame as a new layer - center in canvas - copy/paste dirty button frame as a new layer - center in canvas - click inside this frame with magic wand - selections - modify - expand by 6 - copy/paste paper of choice as a new layer - selections - invert - delete - move paper below button frame only - leave selected and copy/paste a web of choice as a new layer - position and hit delete - select none - drop shadow each frame layer and web
2. Click on grunged frame and copy/paste a ghost of choice as a new layer - resize and position so he is peeking out from behind frame - duplicate - image - mirror and position other ghost - drop shadow both layers
3. Click on top layer - copy/paste boo string as a new layer - resize and position on top of frame - drop shadow
4. Copy/paste hanger as a new layer - position on top left corner of frame - drop shadow - copy/paste spider of choice as a new layer - position on top left corner -drop shadow
5. Copy/paste your tube as a new layer - resize and position on tag - drop shadow
6. Copy/paste any other elements you choose, resizing if needed and position around your tag - drop shadow each layer
7. On white background - copy/paste paper of choice as a new layer - layers - new mask layer - from image- apply mask and delete original - merge group
8. Close out white background - crop/resize tag - add copyright/license info and name - save as .png
That's it! Thank you for trying my tutorial!!
Hallow's Night
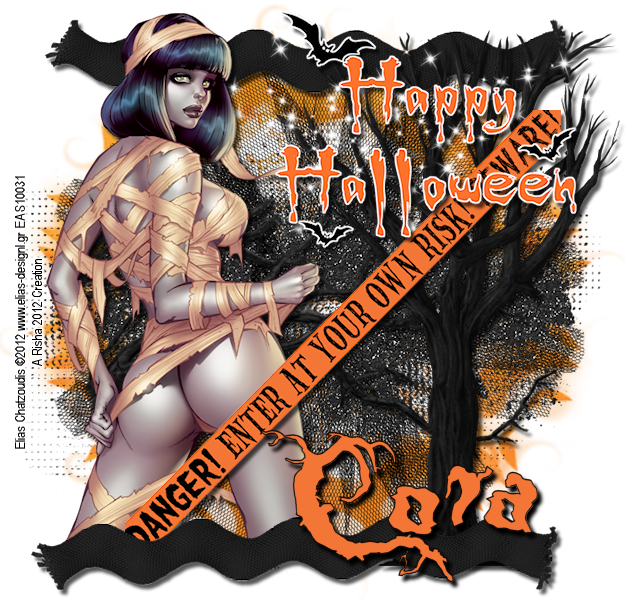
Hallow's Night
This tutorial was written by me on September 17 using PSP X4. All my tutorials assume you have some working knowledge of PSP and/or Animation Shop.
Supplies:
Tube - I'm using the art of Elias Chatzoudis. You need a license to use his art which you can purchase his tubes/license at his shop HERE.
Scrap Kit - I'm using a great kit by Pimp'd Designz called "Hallows Night". You can purchase this kit at PMTw/S.
Mask of choice
Font - I'm using DarkWood
To begin open your tube and mask in PSP and minimize - Open a new 700 x 700 image white background
This is a very simple and quick tutorial so let's get to rockin'!
1. Copy/paste mesh as a new layer - move to the top of your canvas - duplicate - image - flip - copy/paste splatter 02 as a new layer and center in canvas
2. Copy/paste branch 01 as a new layer and position to the left side of mesh - drop shadow - copy/paste ribbon 05 as a new layer - position to the top of canvas and drop shadow
3. Copy/paste tree as a new layer and position on the right side of canvas - resize if needed and drop shadow - copy/paste sparkle as a new layer and position to the top of canvas
4. Copy/paste your tube as a new layer - resize and position on left side - drop shadow - copy/paste danger element as a new layer - resize and position on tag - drop shadow - now click on the branch layer and using your eraser tool if there is any of it sticking out past your tube on the left side erase it
5. Copy/paste wa 01 as a new layer - resize and position towards the top right of tag - drop shadow
6. Copy/paste ribbon 05 again as a new layer and position on the bottom of your canvas - drop shadow
7. On white background - copy/paste a paper of choice as a new layer - layers - new mask layer - from image - apply your mask and delete original mask layer - merge group
8. Close out white background - crop/resize tag - add copyright/license info and name - save as .png
That's it!! Thank you for trying my tutorial!!
Monday, September 17, 2012
Ooky Spooky Boo!

Ooky Spooky Boo!
This tutorial was written by me on September 17 using PSP X4. All my tutorials assume you have some working knowledge of PSP and/or Animation Shop.
Supplies:
Tube - I'm using the art of Elias Chatzoudis. You must have a license to use his art. You can purchase tubes/license at his store HERE.
Scrap Kit - I'm using a great PTU kit from Skullies Scraps called "Ooky Spooky". You can purchase this kit at PMTw/S.
Mask of choice
Font - I'm using Sverige Script Decorated
To begin open tube and mask in PSP and minimize for now - new 700 x 700 image white background
1. Copy/paste circle frame as a new layer - position to the upper right of canvas - duplicate - image - mirror - image - flip - click inside both frame layers with magic wand - selections - modify - expand by 4 - copy/paste paper of choice as new layer - selections - invert - tap delete on keyboard - move paper layer below frame layers - selections - select none - drop shadow frames
2. Copy/paste spooky tendril as a new layer - resize and mirror - position on the left side of canvas - duplicate - image - flip and position on the bottom right of canvas - drop shadow both layers
3. Copy/paste ghost as a new layer - resize if desired - mirror and position inside top frame - drop shadow - copy/paste scary house 1 as a new layer - resize and position on the right side of canvas - drop shadow
4. Copy/paste tag of choice as a new layer - resize and rotate - position to the top left of canvas - drop shadow - copy/paste spider as a new layer - resize and position over tag element - drop shadow
5. Copy/paste skeleton as a new layer - position over bottom frame layer - drop shadow - copy/paste pumpkin as a new layer - resize and position towards the bottom of tag - drop shadow
6. Copy/paste your tube as a new layer - resize if needed and position on tag - drop shadow - copy/paste spooky word art as a new layer - resize and position over bottom of tube - drop shadow
7. On white background copy/paste a paper as a new layer - layers - new mask layer - from image - apply mask and delete original layer - merge group - duplicate mask layer and merge mask layers together
8. Close out white background - crop/resize tag to your preference - add copyright/license info and name - save as a .png
That's it! Thank you for trying my tutorial!!
Gothie's Party

Gothie's Party
This tutorial was written by me on September 17 using PSP X4. All my tutorials assume you have some working knowledge of PSP and/or Animation.
Supplies:
Tube - I'm using the newest cutie from SkyScraps. You need a license to use her art and you can purchase tubes/license at SATC.
Scrap Kit - I'm using a FTU kit from Sassy Deb's Scraps. You can download this kit at Artistic Dreams Imaging. Click on freebies after registering.
Mask - I'm using Grunge Mask1 from Tonya. You can get this mask HERE.
Font - I'm using Casper
To begin open your tube and mask in PSP - minimize for now - new 700 x 700 image white background
1. Copy/paste Frame 5 as a new layer - resize - center in canvas - using free hand tool set on freehand, trace around the outer ring of frame - selections - invert - copy/paste paper of choice as a new layer - hit delete on keyboard - move paper layer below frame - select none
2. Click on Frame layer - copy/paste Branch 2 as a new layer - resize and rotate 75 left - position on frame - duplicate - image mirror - position - drop shadow both layers
3. Copy/paste Balloon 1 and Balloon 2 as new layers - resize on smaller than the other and position on left side of frame - drop shadow both layers
4. Copy/paste Flower of choice as a new layer - resize and position on the bottom left of frame - duplicate - image mirror - drop shadow both layers - copy/paste another flower as a new layer - resize and position in the center of the other 2 flowers and move below those layers - drop shadow
5. Copy/paste any other elements you would like and position around your tag - resize if needed and drop shadow each layer
6. Copy/paste your tube as a new layer and position on tag - drop shadow
7. Click on white background - copy/paste Doodle of choice as a new layer - position on the top right of canvas - duplicate - image mirror then flip - drop shadow both layers
8. Copy/paste fan of choice as a new layer - position on tag - duplicate - image mirror then flip - drop shadow
9. On white background - copy/paste a paper of choice as a new layer - layers - new mask layer - from image - apply mask and delete original mask layer - merge group
10. Close out white background - crop/resize tag - add copyright/license info and name - save as .png
That's it!! Thank you for trying my tutorial!!
Sunday, September 16, 2012
Trick or Treat
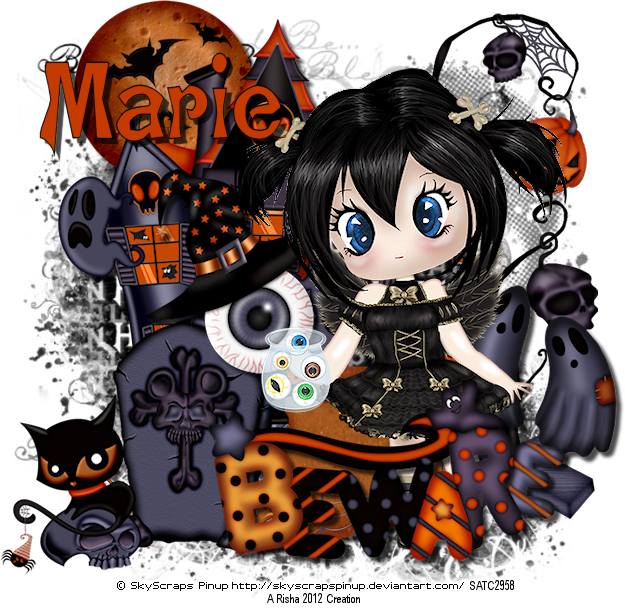
Trick or Treat
This tutorial was written by me on September 16 using PSP X4. All my tutorials assume you have some working knowledge of PSP and/or Animation Shop.
Supplies:
Tube - I'm using the newest tube from SkyScraps. You need a license to use her art and you can purchase this cutie and get a license at SATC.
Scrap Kit - I'm using the newest spookilicious kit from Irish Bitch Designs called "Pumpkin Moon". Visit her blog HERE to find out where you can purchase this kit.
Mask - I'm using one from Vix which you can download HERE.
Font - I'm using Ghostly
To begin open your tube and mask in PSP and minimize for now - open a new 700 x 700 image white background
1. Copy/paste House as a new layer - resize and position to the left of your canvas - drop shadow heavy
2. Copy/paste Tree as a new layer - resize - mirror and position to the right of your canvas - drop shadow
3. Copy/paste Skullsitter as a new layer - resize and position to the bottom left of your house - drop shadow
4. Copy/paste Eye with Hat - resize and position towards the middle of your canvas - drop shadow
5. Copy/paste Ghosties and position just to the right of the eye - drop shadow
6. Copy/paste your tube as a new layer - resize and position on your tag - drop shadow
7. Copy/paste Beware as a new layer - resize and position on bottom of tag - drop shadow
8. Add a new raster layer and flood fill black - move to bottom - layers - new mask layer - from image - apply your mask and delete original mask layer - merge group
9. Close out white background - crop/resize tag - add copyright and license info and name - save as .png
That's it!! Thank you for trying my tutorial!!
SpellBound
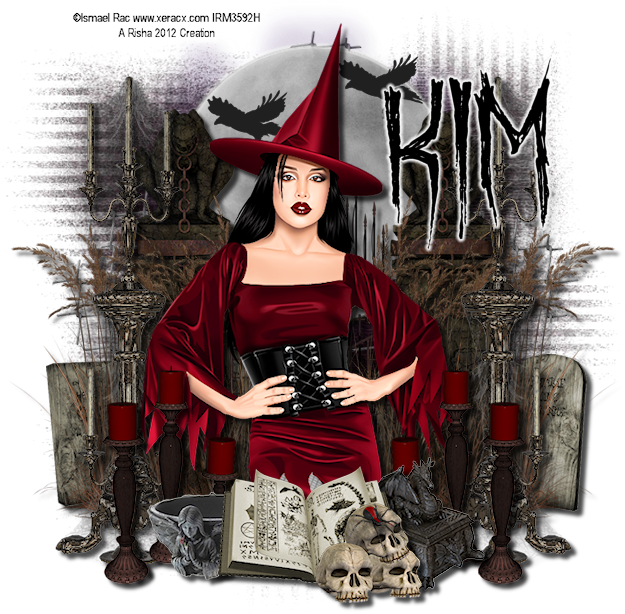
SpellBound
This tutorial was written by me on September 15 using PSP X4. All my tutorials assume you have some working knowledge of PSP and/or Animation Shop.
Supplies:
Tube of choice - I'm using the art of Ismael Rac. You need a license to use his art. You can purchase tubes/license at his store HERE.
Scrap Kit - I'm using a great kit by Kim's Korner called "Season of the Witch". Visit her blog HERE to find out where you can purchase this great kit!
Mask - I'm using WSL Mask81 which you can download HERE.
Font - I'm using October Crow
To begin open your tube and mask in PSP and minimize for now. Open a new 800 x 700 image white background - I usually build my tags from the bottom up so bear with me .....
1. Copy/paste Wire as a new layer - image - free rotate 45 left - center in canvas
2. Copy/paste Tombstones as a new layer - resize and move to the left side of tag - duplicate ( do not mirror) and position to the right side of tag - drop shadow both layers
3. Copy/paste Moonlight as a new layer - position in the center of your tag and move up to the top - you can resize it a bit larger if you want - drop shadow
4. Copy/paste Graveyard Gate as a new layer - resize if desired and center in canvas -drop shadow - you can take this time to tweak your headstones and moon layers if desired
5. Copy/paste Grass as a new layer - position on right side of Gate - duplicate - image - mirror - drop shadow both layers
6. Copy/paste Crow as a new layer - resize fairly small and position on moon - duplicate - and position
7. Copy/paste Candelabra as a new layer - position on left side of gate - duplicate - image - mirror - drop shadow both layers
8. Copy/paste your tube as a new layer - resize if desired and position in center - drop shadow - rearrange your elements if needed
9. Making sure you are on your tube layer - copy/paste Candle01 as a new layer - resize and position - duplicate - image - mirror - drop shadow both layers - copy/paste any other elements you choose and arrange on tag - drop shadow each layer
10. On white background layer - copy/paste a paper of choice as a new layer - layers - new mask layer - from image - apply mask and delete original layer - merge group
11. Close out white background - crop/resize tag to your preference - add copyright/license and name - save as .png
That's it!! Thank you for trying my tutorial!!
Saturday, September 15, 2012
Haunted Flight
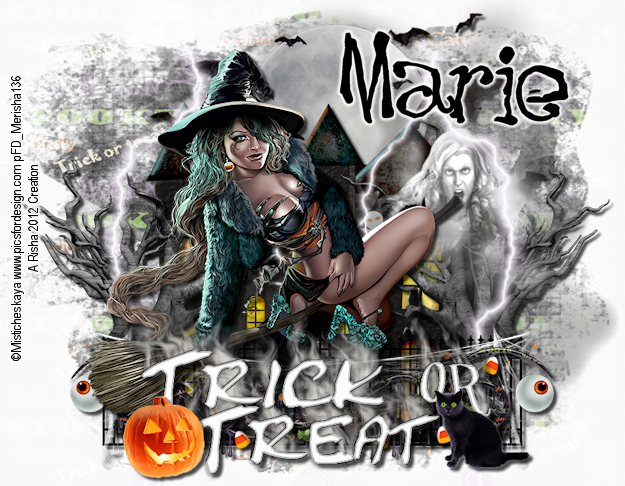
Haunted Flight
This tutorial was written by me on September 15 using PSPX4. All my tutorials assume you have some knowledge of PSP and/or Animation Shop.
Supplies:
Tube of choice - I'm using a great tube by Misticheskaya. You must have a license to use her art and you can purchase tubes/license at PFD.
Scrap Kit - I'm using an awesome kit from SkyScraps which you can purchase at SATC.
Mask - I'm using GrungeMask 5 from Joyita. You can download this mask at Creative Misfits blog HERE.
Font - I'm using Waking The Witch
To begin open your tube and mask in PSP and minimize for now - new 900 x 700 image white background
1. Copy/paste E18 as a new layer - position towards the top center of image - drop shadow
2. Copy/paste E47 as a new layer - resize and position bottom center of tag - drop shadow
3. Copy/paste E22 as a new layer - resize and position to the right of house - duplicate - image - mirror - drop shadow both layers
4. Copy/paste E50 as a new layer - position on the right side of tag on top of the tree - do not drop shadow
5. Copy/paste lightening as a new layer - position on left side of tag - duplicate - image - mirror
6. Copy/paste E37 as a new layer - resize fairly small and position along bottom of house adjusting the tree layers if needed - duplicate - image - mirror - drop shadow
7. Copy/paste E39 as a new layer - resize small and position on left fence - duplicate - image - mirror and position - drop shadow both layers
8. Copy/paste d4 as a new layer - resize and position along bottom left of tag - duplicate - image - mirror - drop shadow both layers and merge layers together
9. Copy/paste your tube as a new layer - resize and position as needed - drop shadow
10. Copy/paste wa3 as a new layer and position over doodle - drop shadow - copy/paste e14 and e9 as new layers - resize and position on either end of word art - drop shadow both layers
11. Close out white background and copy/paste a paper of choice as a new layer - layers - new mask layer - from image - apply mask and delete original mask layer - merge group
12. Leave white background closed and crop/resize tag to your preference - add copyright/license info and name - save as .png
That's it! Thank you for trying my tutorial!!
Friday, September 14, 2012
Witchy Magick
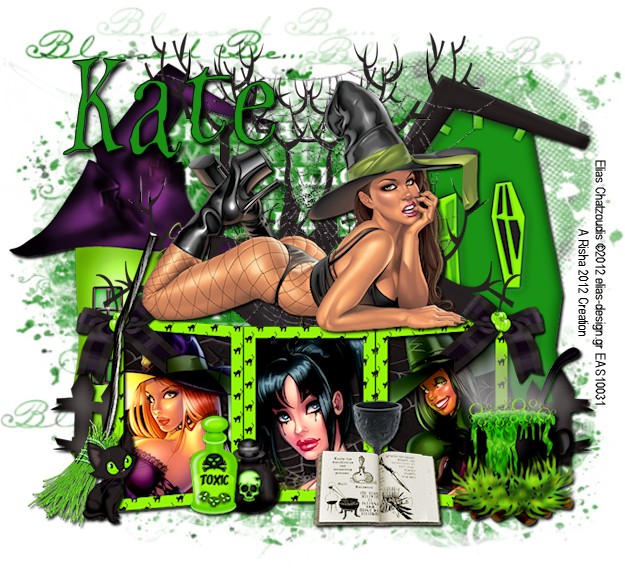
Witchy Magick
This tutorial was written by me on September 14 using PSP X4. All my tutorials assume you have some working knowledge of PSP and/or Animation Shop.
Supplies:
Tube(s) of choice - I'm using the art of Elias Chatzoudis. You need a license to use his art which you can get at his store HERE.
Scrap Kit - I'm using a great PTU kit from Irish Bitch Designs called "Witchy Poo". Visit her blog HERE to find out where you can purchase this great kit.
Mask - I'm using one by Vix which you can get HERE.
Filters - I'm using Xero Bad Dream
Font - I'm using Witches Magick
To begin open your tube(s) and mask in PSP - new image 900 x 800 white background
1. Copy/paste Frame 1 as a new layer - position towards the bottom of your image - using magic wand click inside each frame opening - selections - modify - expand by 6 - copy/paste a paper of choice as new layer - selections - invert - delete - leave selected and move paper layer below frame
2. Copy/paste your first tube as a new layer - resize if needed - position in frame - tap delete - repeat for your other tubes positioning in frame openings - selections - select none - merge your tube layers together - effects - plugins - xero bad dream - apply filter - drop shadow tube layer and frame layer - merge frame, tube, and paper layers together
3. On white background - copy/paste Haunted House and House elements as new layers - resize and position them side by side - drop shadow both layers
4. Copy/paste Tree as a new layer - position on left side of Haunted House element - duplicate - image - mirror - position - drop shadow both layers
5. Copy/paste Spiderweb as a new layer - position in center of trees - resize if desired - use your eraser tool to remove parts of web sticking past your elements - copy/paste fence as a new layer - resize and position along the bottom of your houses - duplicate - image - mirror - drop shadow both layers
6. Copy/paste cauldron as a new layer - resize and position on the right side of frame - drop shadow
7. Copy/paste bow as a new layer - resize and position on left top of frame - resize - duplicate - image - mirror - drop shadow both layers
8. Copy/paste any other elements you desire and position along the bottom of your frame - resizing as needed and drop shadow each layer
9. Copy/paste your main tube image as a new layer - position on top of frame layer ( if it is a tube lying down, if not paste behind frame layer) - resize if needed and drop shadow
10. On white background - copy/paste paper of choice as new layer - layers - new mask layer - from image - apply mask - delete original mask layer and merge group
11. Close out white background - crop/resize tag - add copyright/license info and name - save as .png
That's it! Thank you for trying my tutorial!!
Wednesday, September 12, 2012
Witchy Flight
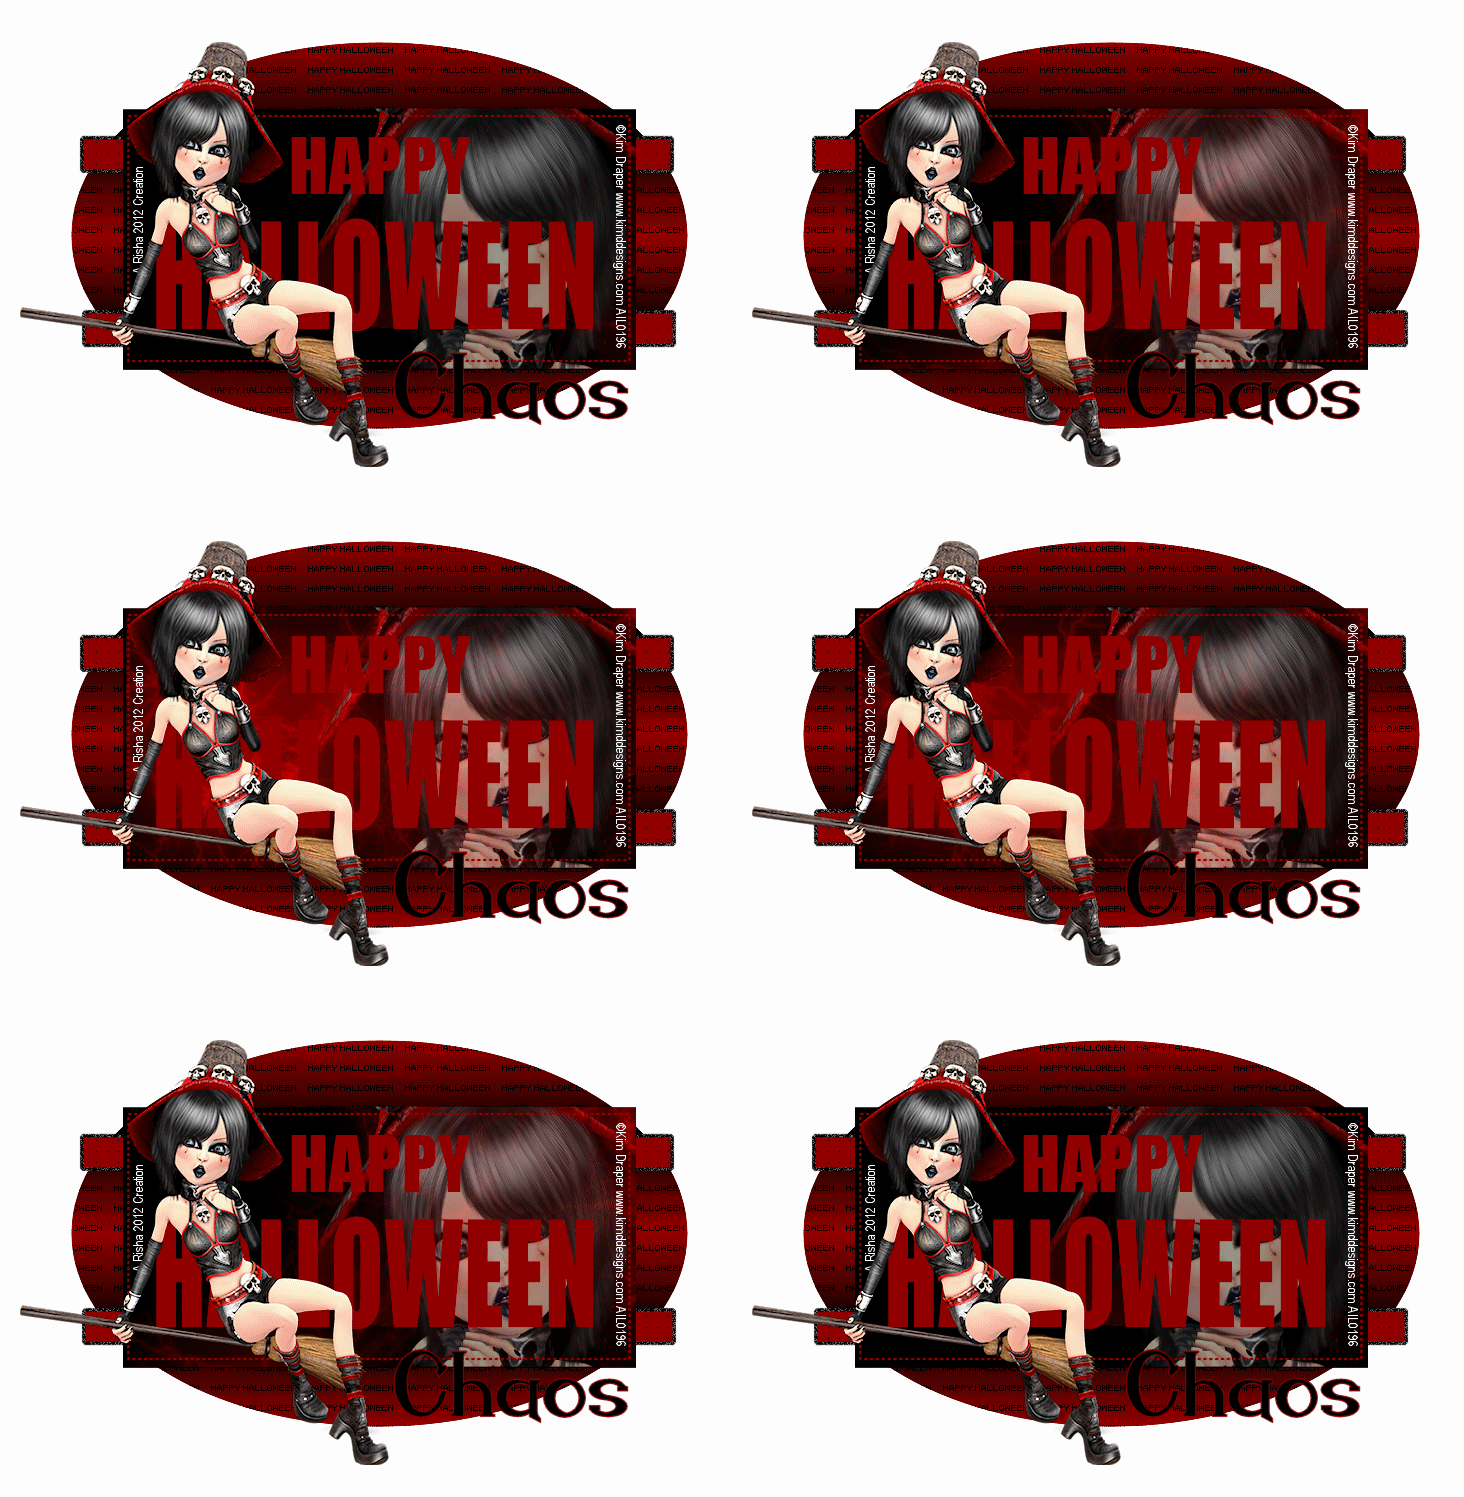
Witchy Flight
This tutorial was written by me on September 12 using PSP X4. All my tutorials assume you have some working knowledge of PSP and/or Animation Shop.
Supplies:
Tube of Choice - I'm using the art of Kim Draper. You need a license to use her art which you can
purchase a license and tubes at AIL.
Template - I'm using Tracy's Halloween Template 10. You can download this template HERE.
Animation - I'm using animation 12 from Chaos. Visit her blog HERE to download.
Animation Shop
Font - I'm using Endora
To begin open your template in PSP - shift-D to duplicate and close original - open tube and minimize
This is a very long tutorial with a lot of steps and we are going to start by getting our animation ready first
ANIMATION PREP STEPS:
1. Open up Animation Shop and open your animation
2. Click on Frame 51 - hold down shift key and click on Frame 100 - this will select all the frames 51-100 - go to edit and hit delete
3. Click on Frames 1 - 4 and delete those
4. Choose a color from your tube (not black) - go to edit - select all - animation - replace color - click all frames - old color blue - new color the one from your tube - click ok
5. Edit - selections - select all - copy and paste as NEW animation - edit - select all - edit - copy - on original animation - click on last frame - edit - paste - after current frame ( you should have 100 frames) - play your animation to make sure that it doesn't skip
BACK TO PSP
1. Delete copyright layer - click on your oval layer on template - layers - new raster layer - move to bottom - image - canvas size - 800 x 600 - flood fill white
2. Back on your template - choose 2 colors from your tube and create a gradient with the following setting : linear, angle 0 , repeats 3
3. Beginning on your oval layer - selections - select all - float - defloat - new raster layer - flood fill with gradient - repeat for your other layers leaving the rectangle layer black
4. On rectangle layer - selections - select all - float - defloat - copy/paste your tube close up as a new layer - selections - invert - delete - copy/paste your full tube as a new layer and position on tag - resize if needed
5. Crop your tag and resize - add copyright and license info ( will we add name later) - close out your copyright/license layers, top 2 text layers ( Happy Halloween), tube layers and rectangle layer - merge visible - close out your merged layer leaving rectangle layer closed - open the other layers and merge those visible - you should now have 3 layers: 2 merged layers and your rectangle layer
6. On your bottom merged layer (white background, oval, small text and strips) - edit - copy
BACK TO ANIMATION SHOP
1. Edit - paste as new animation - duplicate until you have 100 frames ( yep, that many) - minimize for now
2. Back in PSP - on rectangle layer - edit - copy - BACK in animation shop - edit - paste - as new animation - duplicate this layer until you have 100 frames
3. Maximize your animation - edit - select all - edit - copy - BACK on rectangle - edit - select all - edit - paste into current frame - play your animation - if happy we are now ready to crop - edit - selections - select all - click on your crop button ( it looks the same as the one in PSP) - options - surround opaque - click ok
4. Edit - selections - select all - copy - back on your merged layer animation - edit - select all - edit - paste into current frame - position your rectangle and release mouse - play animation again
BACK TO PSP
1. Click on your other merged layer - edit - copy and go back to animation shop
ANIMATION SHOP
1. Edit - paste as new animation - edit - click on propagate paste - edit - copy - click on your tag making sure all layers are selected - paste into current frame - position and release mouse - play your animation once again - if you are happy save ( I always save my blank animated tags so I can add names to them later)
BACK TO PSP ( promise this is the last time!)
Add your name using your text and convert to raster and copy your name layer - back to animation shop one more time
ANIMATION SHOP
1. Paste your name as new animation - copy - on your tag making sure propagate paste is still selected - paste into current selection - position and release mouse - save as .gif
That's it!! I know it's a lot of steps, but would love to see what you create!!
Friday, September 7, 2012
Wicked Cutie

Wicked Cutie
This tutorial was written by me on September 7 using PSP X4. All my tutorials assume you have some working knowledge of PSP and/or Animation Shop.
Supplies:
Tube - I'm using a great image by Creepie Cuties. You must have a license to use this image. You can purchase tubes/license at AIL.
Scrap Kit - I'm using a cute PTU kit from Pimp'd Designz called "Wicked". You can purchase this kit at PMTw/S.
Mask - I'm using grunge mask 3 by Sue. You can download this mask HERE.
Font - I'm using FangSong
To begin open tube and mask in PSP - minimize for now - open a new 700 x 700 image white background
1. Copy/paste pp-03 from kit as new layer - layers - new mask layer - from image - apply mask and delete original - merge group - selections - select all - float - defloat - c/p light-02 into selection - selections - select none
2. Copy/paste web as new layer - center in canvas - copy/paste moon as new layer - rotate - position to left of web - drop shadow
3. Copy/paste sparkle as new layer - position towards upper left of tag - duplicate - image - mirror - image - flip
4. Copy/paste tree as a new layer - resize - position on right side of tag - duplicate - resize once more - image - mirror - position this layer on right side - drop shadow both layers
5. Copy/paste spider as new layer - resize - position on web - drop shadow
6. Copy/paste pumpkin as new layer - image - mirror - resize - position on bottom right of tag - duplicate - image - resize and mirror - position next to the other pumpkin - drop shadow both layers
7. Close out white background - crop/resize tag - add copyright/license info and name - save as .png
That's it! Thank you for trying my tutorial!!
Luna Witch
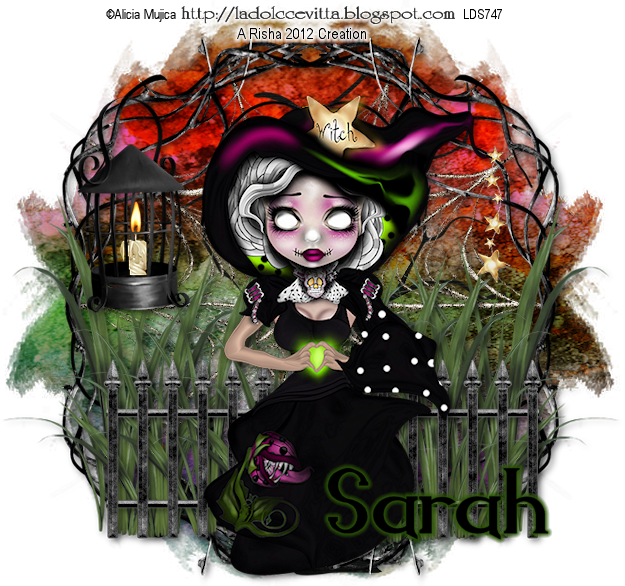
Luna Witch
This tutorial was written by me on September 7 using PSP X4. All my tutorials assume you have some working knowledge of PSP and/or Animation Shop.
Supplies:
Tube of choice - I'm using a fantastic new image from Alicia Mujica. You need a license to use her art and you can purchase tubes/license at her blog HERE.
Scrap Kit - I'm using an adorable kit from Designs by Sarah. You can purchase this kit at PMTw/S.
Texture - I'm using a texture from kuschelirmel-stock. You can download this texture HERE.
Mask - I'm using grunge mask 4 from Tonya. You can download this mask HERE.
Font - I'm using Endora
Eye Candy 5000 gradient glow - dsb flux bright noise
To begin open tube, mask, and texture in PSP - minimize for now - open a new 700 x 700 image white background
1. We are going to make the frame so copy/paste branch as new layer - position on left side of tag - duplicate - image - mirror - merge down - duplicate this layer - image - flip - merge down
2. Create a gradient using 2 colors from your tube - linear, angle 0, repeats 3 - add a new raster layer - floodfill with your gradient - layers - new mask layer - from image - apply your mask - delete original layer - merge group - new raster layer - selections - select all - copy/paste your texture into selection - deselect - apply your mask again - change properties on texture layer to overlay
3. Copy/paste tree as new layer - resize - position on tag - c/p spiderweb as new layer - dsb flux bright noise settings your choice - drop shadow web and frame layers - use eraser tool to remove parts of web showing outside of frame
4. Copy/paste grass as new layer - position - duplicate - image - mirror - duplicate again - image - resize 85% - position - duplicate this layer as many times as you want arranging along the bottom of frame - merge your grass layers together - drop shadow
5. Copy/paste fence as new layer - resize - position along bottom of frame - drop shadow
6. Copy/paste cage as new layer - resize - position on top left of frame - copy/paste candle as new layer - resize pretty small cause we are going to make it appear it is in the cage - when you are happy with the size of candle position it over the cage how you want it to appear - using your selection tool - freehand - trace around the parts of the candle you don't want showing - hit delete on keyboard - if you mess up just hit undo - once you are happy drop shadow candle and cage
7. Close out white background - crop/resize tag to your preference - add copyright/license info and name - save as .png
That's it!! Hope you enjoy my tutorial!!
Monday, September 3, 2012
PTU Tut: Wicked Babe
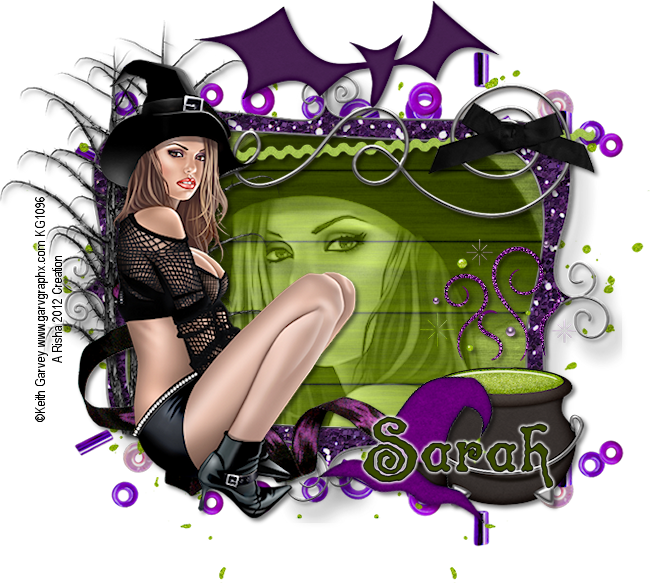
Wicked Babe
This tutorial was written by me on September 3 using PSP X4. All my tutorials assume you have some working knowledge of PSP and/or Animation Shop.
Supplies:
Tube of choice - I'm using the art of Keith Garvey. You must have a license to use his art which you can purchase at his store HERE.
Scrap Kit - I'm using Designs by Sarah's portion of the "Wicked Way" store collab from PMTw/S. You can purchase this great collab HERE.
Font - I'm using Spinstee
To begin open a new 700 x 700 image white background - open tube in PSP and minimize for now
1. Copy/paste frame 1 as new layer - resize - click inside with magic wand - selections - modify - expand by 6 - copy/paste paper of choice - selections - invert - delete - copy/paste tube - position and resize - delete - change properties to Luminance (L) and opacity to your choice - drop shadow tube and frame layers
2. Copy/paste tree as new layer - resize - position on left side of frame - drop shadow - c/p ribbon 2 as new layer - image - mirror - resize - position on left side of frame - drop shadow - copy/paste your tube as new layer - resize - position over ribbon - drop shadow
3. Copy/paste ribbon 1 as new layer - resize - iamge - mirror - position along top of frame - drop shadow
4. Copy/paste bat, cauldron, and witch's hat as new layers - resize and position on tag- drop shadow each layer
5. Click on white background - copy/paste beads as new layer - resize - position towards top of tag - duplicate - image - flip - drop shadow both layers
6. Copy/paste splatter of choice as new layer - resize - position on tag - duplicate - image - flip
7. Close out white background - crop/resize tag - add copyright/license info and name - save as .png
That's it!! Thank you for trying my tutorial!!
PTU Tut: Something Wicked

Something Wicked
This tutorial was written by me on September 3 using PSP X4. All my tutorials assume you have some working knowledge of PSP and/or Animation Shop.
Supplies:
Tube of choice - I'm using the art of Elias Chatzoudis. You need a license to use his art which you can get at his store HERE.
Scrap Kit - I'm using Pimp'd Designz portion of PMTw/S store collab "Wicked Way". You can purchase this great collab HERE.
Font - I'm using Blood Omen
To begin open a new 700 x 700 image white background - open tube in PSP and minimize
1. Copy/paste frame 2 as new layer - resize - click inside with magic wand - copy/paste paper of choice as new layer - selections - invert -delete - copy/ paste tube as new layer - position - resize if needed - hit delete - deselect - drop shadow tube and frame layers - change properties on tube to screen and opacity to your choice
2. Copy/paste lamp as new layer - position on right side of frame - copy/paste tube again as new layer - position - resize if needed - drop shadow lamp and tube - erase any part of lamp showing below tube - c/p ribbon 3 as new layer - resize - drop shadow - position on lamp
3. Copy/paste net as new layer - resize - position on left of frame - drop shadow - c/p doodle 01 as new layer - position bottom of tag - resize - move below tube layer - drop shadow
4. Copy/paste cauldron as new layer - resize position on left bottom of tag - resize - drop shadow - move above net layer
5. Copy/paste cloud as new layer - resize - position on top left of tag - drop shadow and move above above net layer
6. On white background - copy/paste swirl as new layer - position toward the top left of tag - duplicate - image - mirror - image - flip - copy/paste print as new layer - position on top of tag - duplicate - image - flip - merge down - duplicate
7. Close out white background - crop/resize tag - add copyright/license and name - save as .png
That's it!! Thank you for trying my tutorial!!
PTU Tut: Not So Wicked

Not So Wicked
This tutorial was written by me on September 3 using PSP X4. All my tutorials assume you have some knowledge of PSP and/or Animation Shop.
Supplies:
Tube of Choice - I'm using the art of Ismael Rac. You need a license to use this image. You can purchase tubes/license at his store HERE.
Scrap Kit - I'm using Polka Dot Scraps portion of PMTw/S store collab "Wicked Way". You can purchase this great collab HERE.
Font - I'm using Aspire
This is a very easy tutorial so let's begin - open a new 800 x 700 image white background - open tube in PSP and minimize
1. Copy/paste frame 1 as new layer - resize 85% - image - free rotate - 90 left
2. Click inside with magic wand - selections - modify - expand by 6 - copy/paste paper of choice as new layer - selections - invert - hit delete on keyboard - copy/paste fence as new layer - resize - position on left of paper layer - duplicate - image - mirror - merge down - hit delete - copy/paste tube as new layer - position - resize - hit delete - dropshadow tube, fence and frame layers - on tube layer - change properities to luminance legacy and opacity to level of choice
3. Copy/paste ribbon 5 as new layer - resize - position on left side of frame - copy/paste broom charm as new layer - resize - position over ribbon layer - drop shadow both layers
4. Copy/paste flower of choice - resize - position on top right of tag - copy/paste arrow as new layer - resize - position on bottom right of tag - copy/paste cat as new layer - resize - position on bottom right of tag - drop shadow all layers
5. On white background - copy/paste another flower - resize - position towards top right of tag - duplicate - move down - duplicate - move down again - drop shadow all layers
6. Back on white background - copy/paste frame 2 as new layer - position towards top right of tag - duplicate - image - mirror - image - flip - merge down - adjust - blur - gaussian 7
7. Close out white background - crop/resize tag - add copyright/license and name - save as .png
That's it!! Thank you for trying my tutorial!!
Tuesday, August 28, 2012
PTU Tut: Trick My Treat

Trick My Treat
This tutorial was written by me on August 28 using PSP X4. All my tutorials assume you have some working knowledge of PSP and/or Animation Shop.
Supplies:
Tube of choice - I'm using the newest tube from Keith Garvey. You must have a license to use his art. You can purchase his tubes/license at his store HERE.
Scrap Kit - I'm using an awesome kit from Irish Bitch Designs called "Witchypoo". Visit her blog HERE to find out where you can purchase this great kit
Mask of choice
Font - I'm using Spinstee
To begin open your tube and mask in PSP - minimize for now - open a new 700 x 700 image white background
1. Copy/paste frame3 as new layer - click inside frame - copy/paste paper of choice as new layer - selections - invert - delete - copy/paste your tube as new layer - position - hit delete - selections - select none - copy/paste your tube again as new layer - take eraser tool and remove the parts of tube hanging outside frame ( see my tag) - drop shadow bottom tube layer and frame
2. Copy/paste the following elements as new layers resizing as needed and position them around the bottom of your tag: bottle1, cat, cauldron, fire, pumpkin, shoe, and sign - add a dropshadow to each layer
3. Copy/paste hat of choice as new layer - resize and rotate - position on top of frame - drop shadow - copy/paste spiderweb as new layer - resize - position over sign - adjust sharpness sharpen
4. Click on white background - copy/paste paper of choice as new layer - layers - new mask layer - from image - apply - delete original mask layer - merge group - copy/paste stars as new layer - resize - position - duplicate - position - drop shadow stars layers
5. Copy/paste curls as new layer - resize and position on left of tag - duplicate - image - mirror - drop shadow both layers
6. Close out white background - crop/resize tag - add copyright/license info and name - save as .png
That's it!! Thank you for trying my tutorial!!
Monday, August 27, 2012
PTU Tutorial: Just A Treat

This tutorial was written by me on August 27 using PSP X4. All my tutorials assume you have some working knowledge of PSP and/or Animation Shop.
Supplies:
Tube of choice - I'm using the amazing art of Keith Garvey. You need a license to use his art and you can purchase tubes/license at his store HERE.
Scrap kit - I'm using a great kit by Gemini Creationz called " Every Witch Way". Visit her blog HERE to find out where to purchase this kit.
Template - I'm using Halloween Template 1 from Tracy F . You can download this template HERE.
Font - I'm using Jellyka Vampire Street
1. To begin open your tube in PSP - minimize - Open your template - Shift+D to duplicate - canvas size 800 x 600 - flood fill white - delete copyright, word art, bat and spider layers
2. Beginning with your mask layer - selections - select all - float - defloat - copy/paste paper of choice into selection - selections - select none
3. On circle 1 layer - selections - select all - float - defloat - copy/paste another paper as new layer - selections - invert - delete - select none - delete original layer - repeat for other layers except frame layer
4. On your frame layer - choose a gradient that matches your tag ( I chose a Halloween one) - selections - select all - float - defloat - layers - new raster - flood fill with gradient - select none - delete original frame layer - on flood fill layer - adjust - add/remove noise - setting your choice
5. Copy/paste your tube as a new layer - resize if needed - position under frame layer ( see my tag ) - erase parts of tube you don't want showing - drop shadow - duplicate - on original tube change properties to Luminance (L) - on duplicate layer change properties to soft light - drop shadow your frame layer
6. Copy/paste your tube again as new layer - position on tag - drop shadow
7. Copy/paste any other elements you would like resizing if needed - arrange on tag - drop shadow each layer
8. Close white background - crop/resize tag to your preference - add copyright/license info and name - save as .png
That's it!! Thank you for trying my tutorial!!
Thursday, August 23, 2012
PTU Tut - Witch's Brew

Witch's Brew
This tutorial was written by me on August 23 using PSP X4. All my tutorials assume you have some working knowledge of PSP and/or Animation Shop.
Supplies:
Tube of choice - I'm using a great tube by Elias Chatzoudis. You need a license to use his work and you can purchase his tubes/license at his store HERE.
Scrap Kit - I'm using a cute Halloween kit from TammyKat at TK Designz called "Black Cats & Potions". You can purchase this kit at PMTw/S.
Mask - I'm using WSL Mask 81 which you can get HERE.
Font - I'm using Feathergraphy Decoration
Eye Candy 4000 gradient glow
To begin open tube and mask in PSP - minimize for now - new image 700 x 700 white background
1. Copy/paste paper tree as new layer - resize if needed - position in center of canvas - add a slight glow to tree color white - duplicate - image - mirror - duplicate again - image - mirror - rearrange to your preference
2. Copy/paste spider web as new layer - resize - image - mirror - position over trees
3. Copy/paste your tube as a new layer - resize - mirror if wanted - position on left side of tag - drop shadow
4. Copy/paste fence as new layer - resize - position - drop shadow - copy/paste beaded string of choice - resize - position along top of fence - drop shadow
5. Copy/paste any other elements you wish - resizing and positioning around your tag - I used black cat, cauldron, broom, and potion bottles - add a gradient glow to any elements that blend into each other and drop shadow the rest
6. On white background - copy/paste paper of choice - layers - new mask layer - from image - apply and delete original mask - merge group
7. Close out white background - crop/resize tag - add copyright/license info and your name - save as .png
That's it!! Thank you for trying my tutorial.
Subscribe to:
Posts (Atom)
About Me

- Risha
- Vernon, Florida, United States
- Hello! I'm a SAHM of 2 beautiful children Wyatt & Caitlyn and have been married to my wonderful husband Everett for 9 years. I live in a small town in NW Florida and am owned by several miniature dachshunds. I've been PSPing for 7 years now and just now decided to put my tags into tutorial form. When I'm not busy taking care of my various animals which not only is dachshunds, but includes various types of fowl and poultry I am playing with my kids or at my computer.
Licensing


